Digital Audio Workstation – DAW
The DAW I use is FL Studio. There is no particular magical reason I use FL Studio over another one, except when I was getting back into recording some years ago, my son was using FL, and I thought I would give it a try. With any equipment choice there will always be people who love it, and others touting the benefits of something else. I am sure that all the techniques I use, can be used to setup any DAW this way.
So, are you ready to go deep into how I set things up in my system?
Well, if your eyes have dropped down below the separation line, then it must be a YES!
Going back to the beginning of my recording experience, it was all analog, with hardware, and physical equipment. Mixers, tape machines, preamps, EQs, etc., AND miles of cabling! So, as I was getting back into this, I was thinking sure there is plenty of great software, but what was I going to use for the frontend, to get into the DAW? The analog to digital converter? The hardware? I wanted something good, but not break the bank either, so I went looking used on eBay.
(This choice for the ADDA converter I didn’t realize until later, that it would limit my other choices going down the line, due to the computer cable interface it had. ***The fun of buying something slightly older in technology, then what is the current latest and greatest, right?)
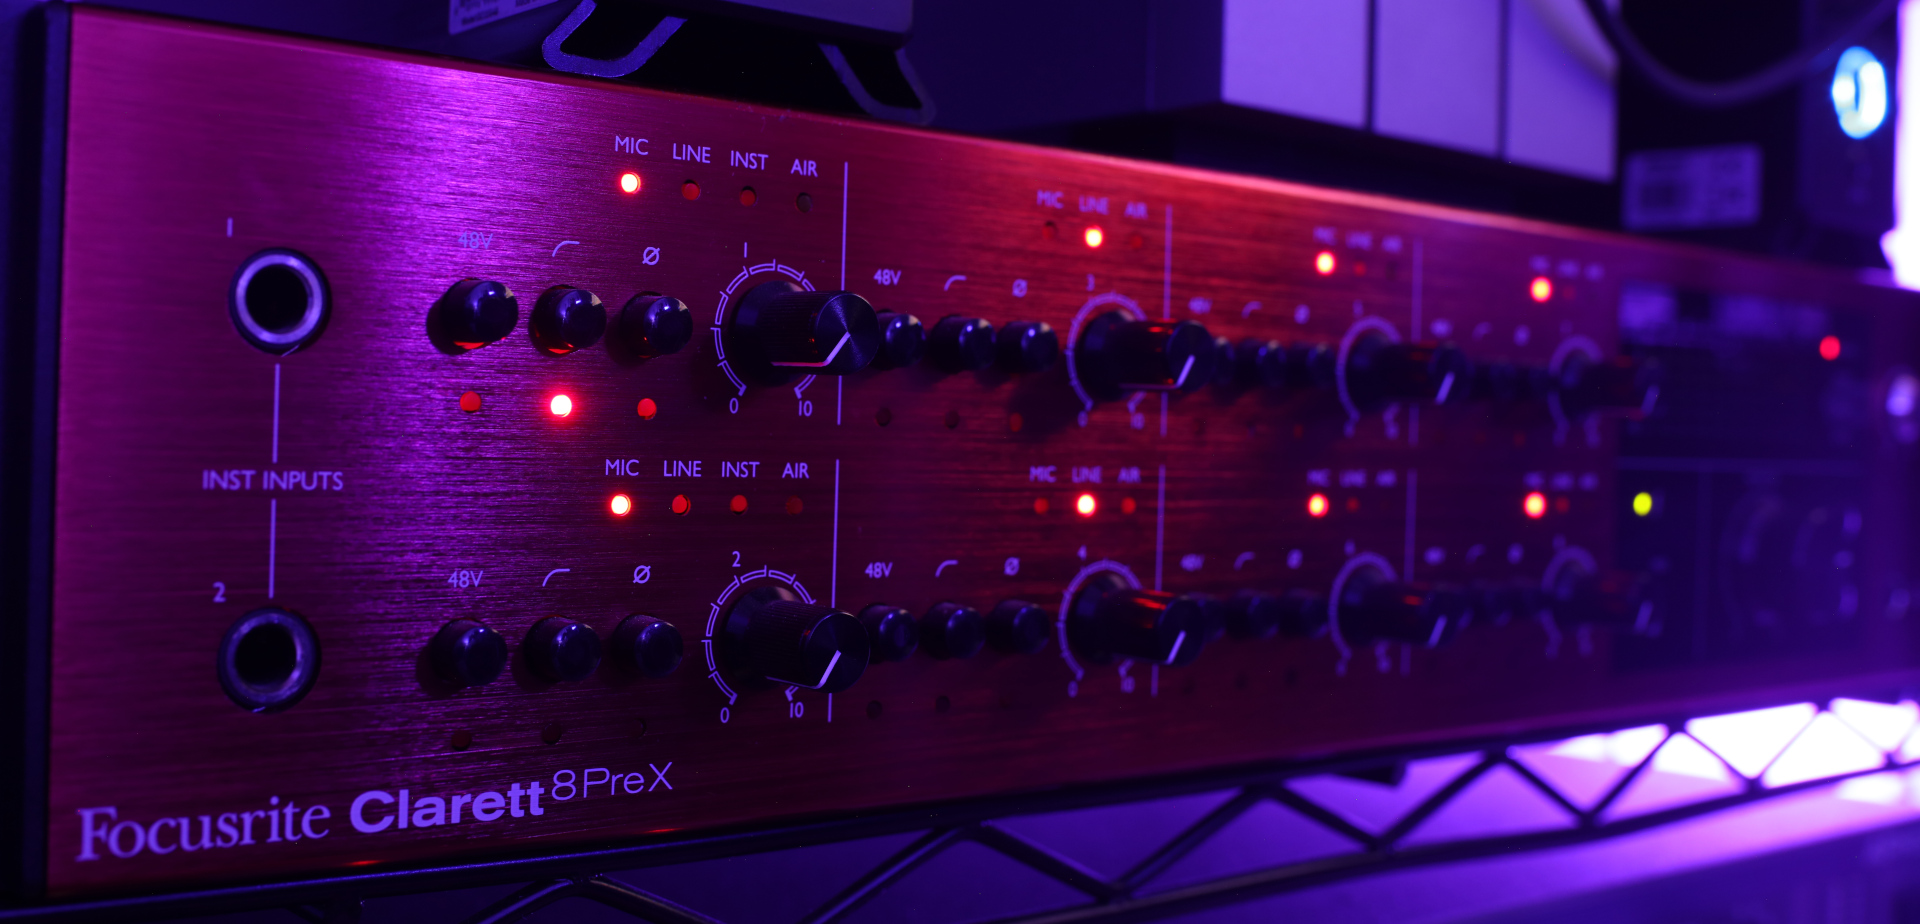
I got the Focusrite Clarett 8PreX. It is a clean, beautiful piece of studio grade level equipment. I decided that this would be the centerpiece, of the analog part, of my new setup. What I didn’t know, until later, is that the Thunderbolt interface it had, to connect to the computer, had various versions that were not interchangeable. This one had a Thunderbolt 2 interface.
So, then I went to researching getting a really good computer, that worked with this older interface. I decided on getting the Apple Trash Can. I ended up getting two of them as you see below. (We will get into why I did that later.)
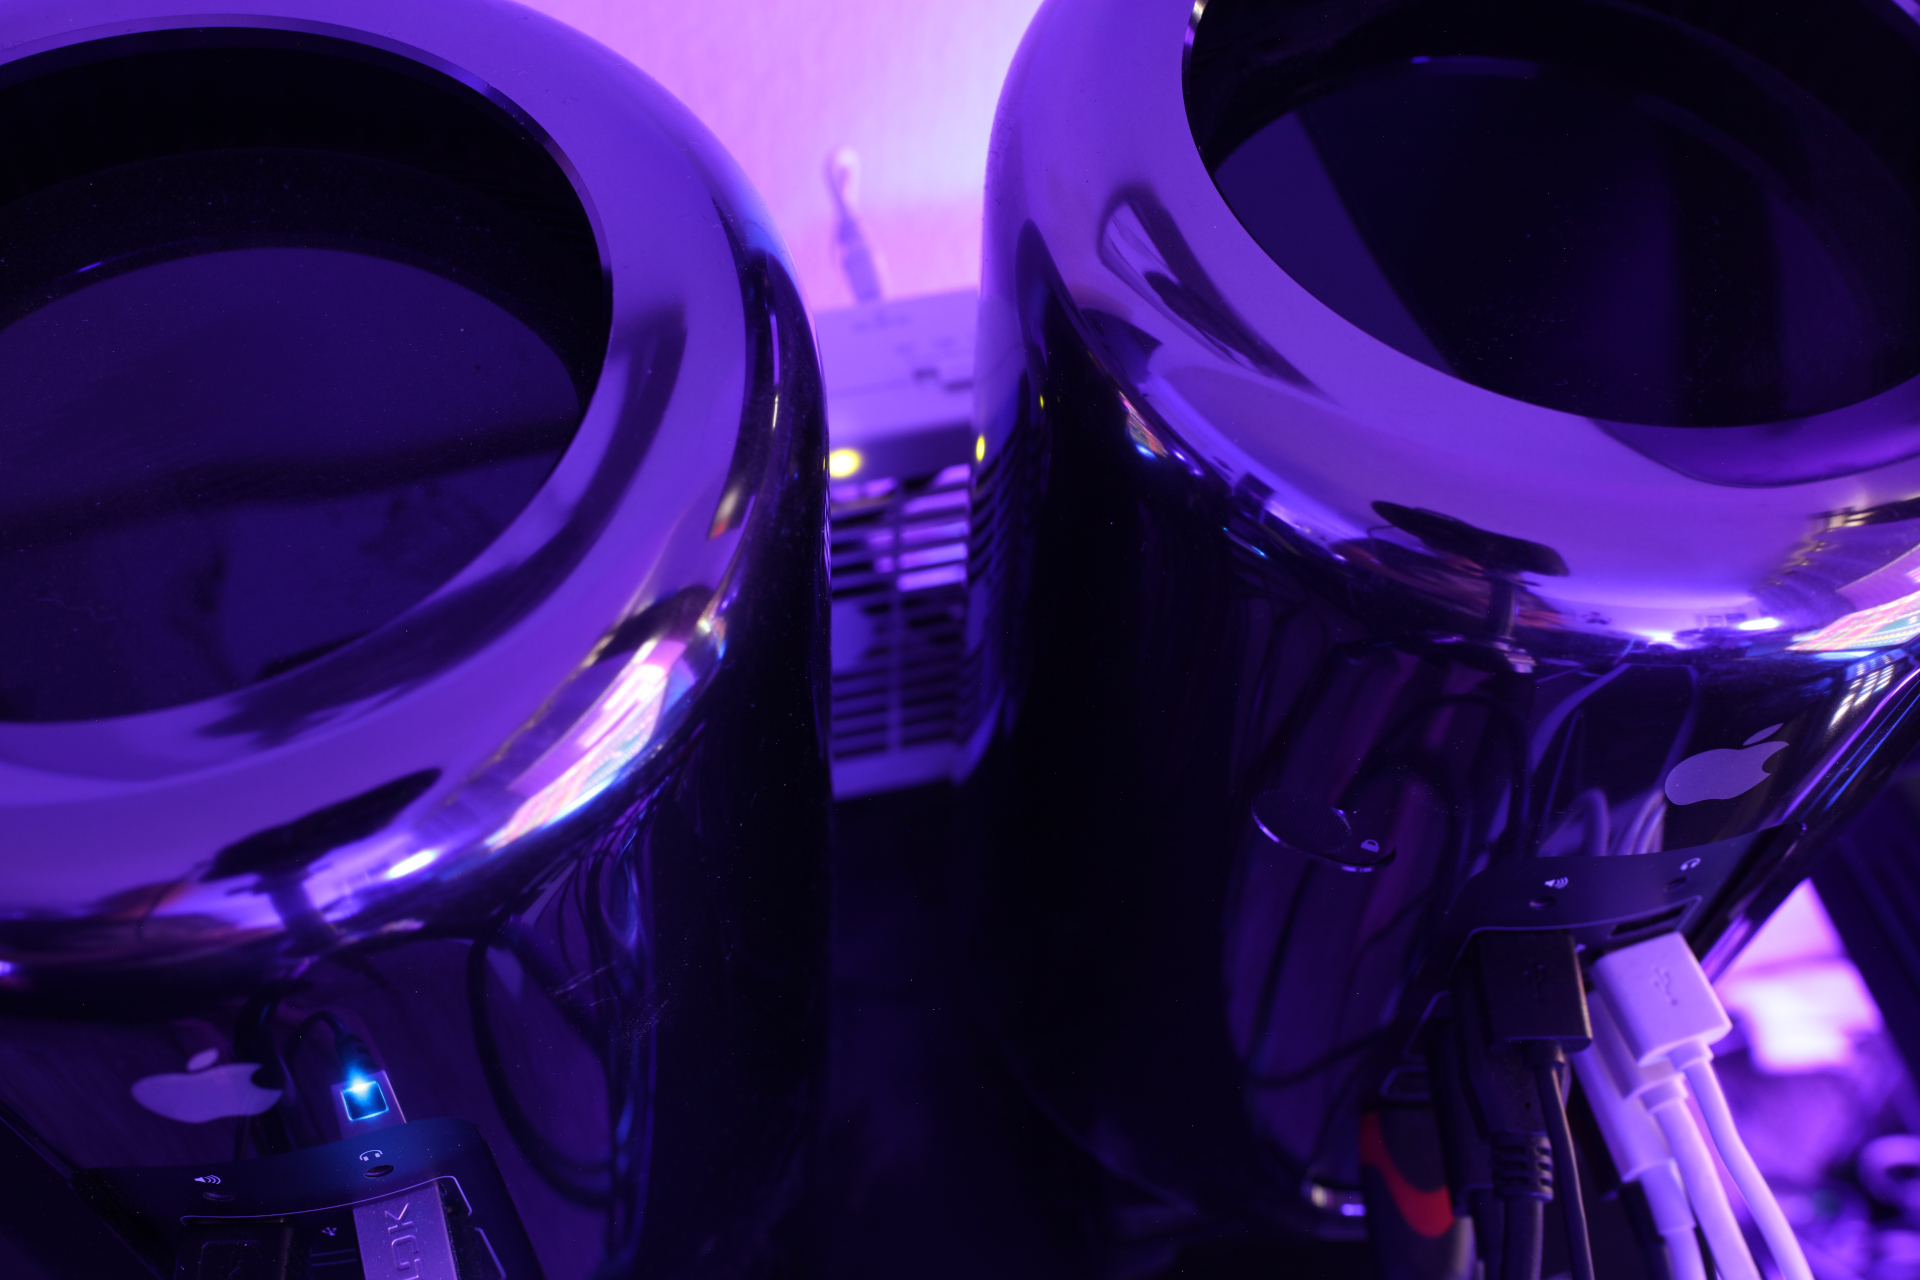
Each of these computers have 12 processing cores. With audio we need lots of processing power, and these have the power. (To clarify, these have the computing horsepower of a generation ago. The latest chips and computers have much more power than these do, but making the decision to get an older interface that was built for computers a generation ago, put me down this path. And to be real, we can’t all be buying the latest and greatest, and this worked out for me, because this path ended up costing me less to get to where I wanted to be. Or did it?)
As I was looking into things that were a generation back, it opened other opportunities to get some things at lower cost. Through eBay, I was also able to pick up two Universal Audio UAD-2 Satellites with plug-ins!
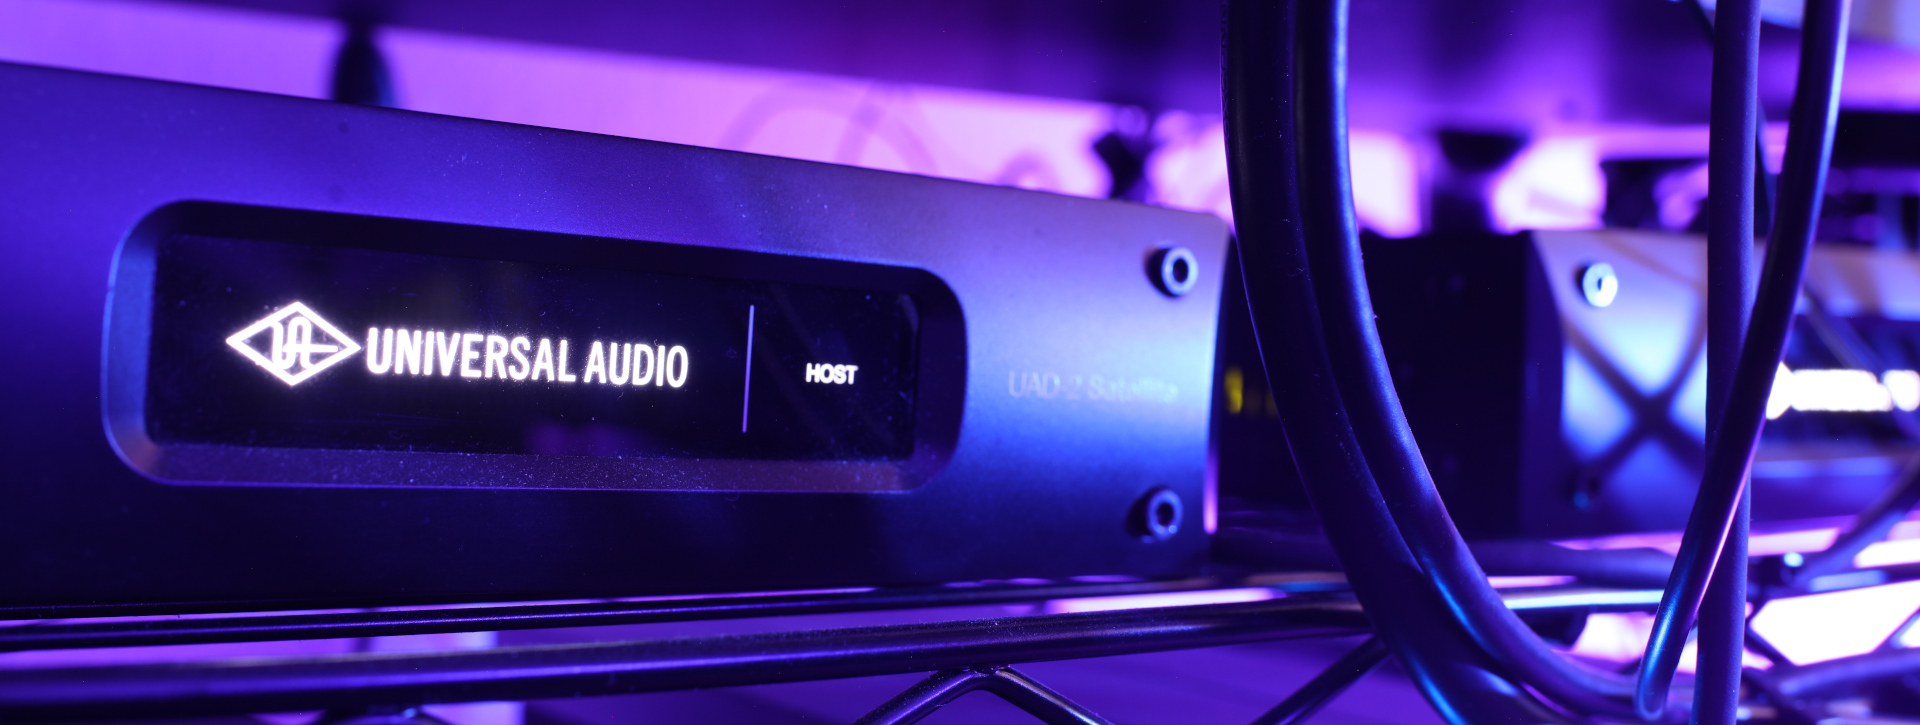
Each of these units have 8 computer processing cores, and share the same Thunderbolt 2 interface my computers and Focusrite have. I love the plug-ins and processing power these provide. Once I had these, I was wondering to myself that, it would be great, if all my other native plugins could be processed on a separate box like this. With a little research I found that yes indeed they can!
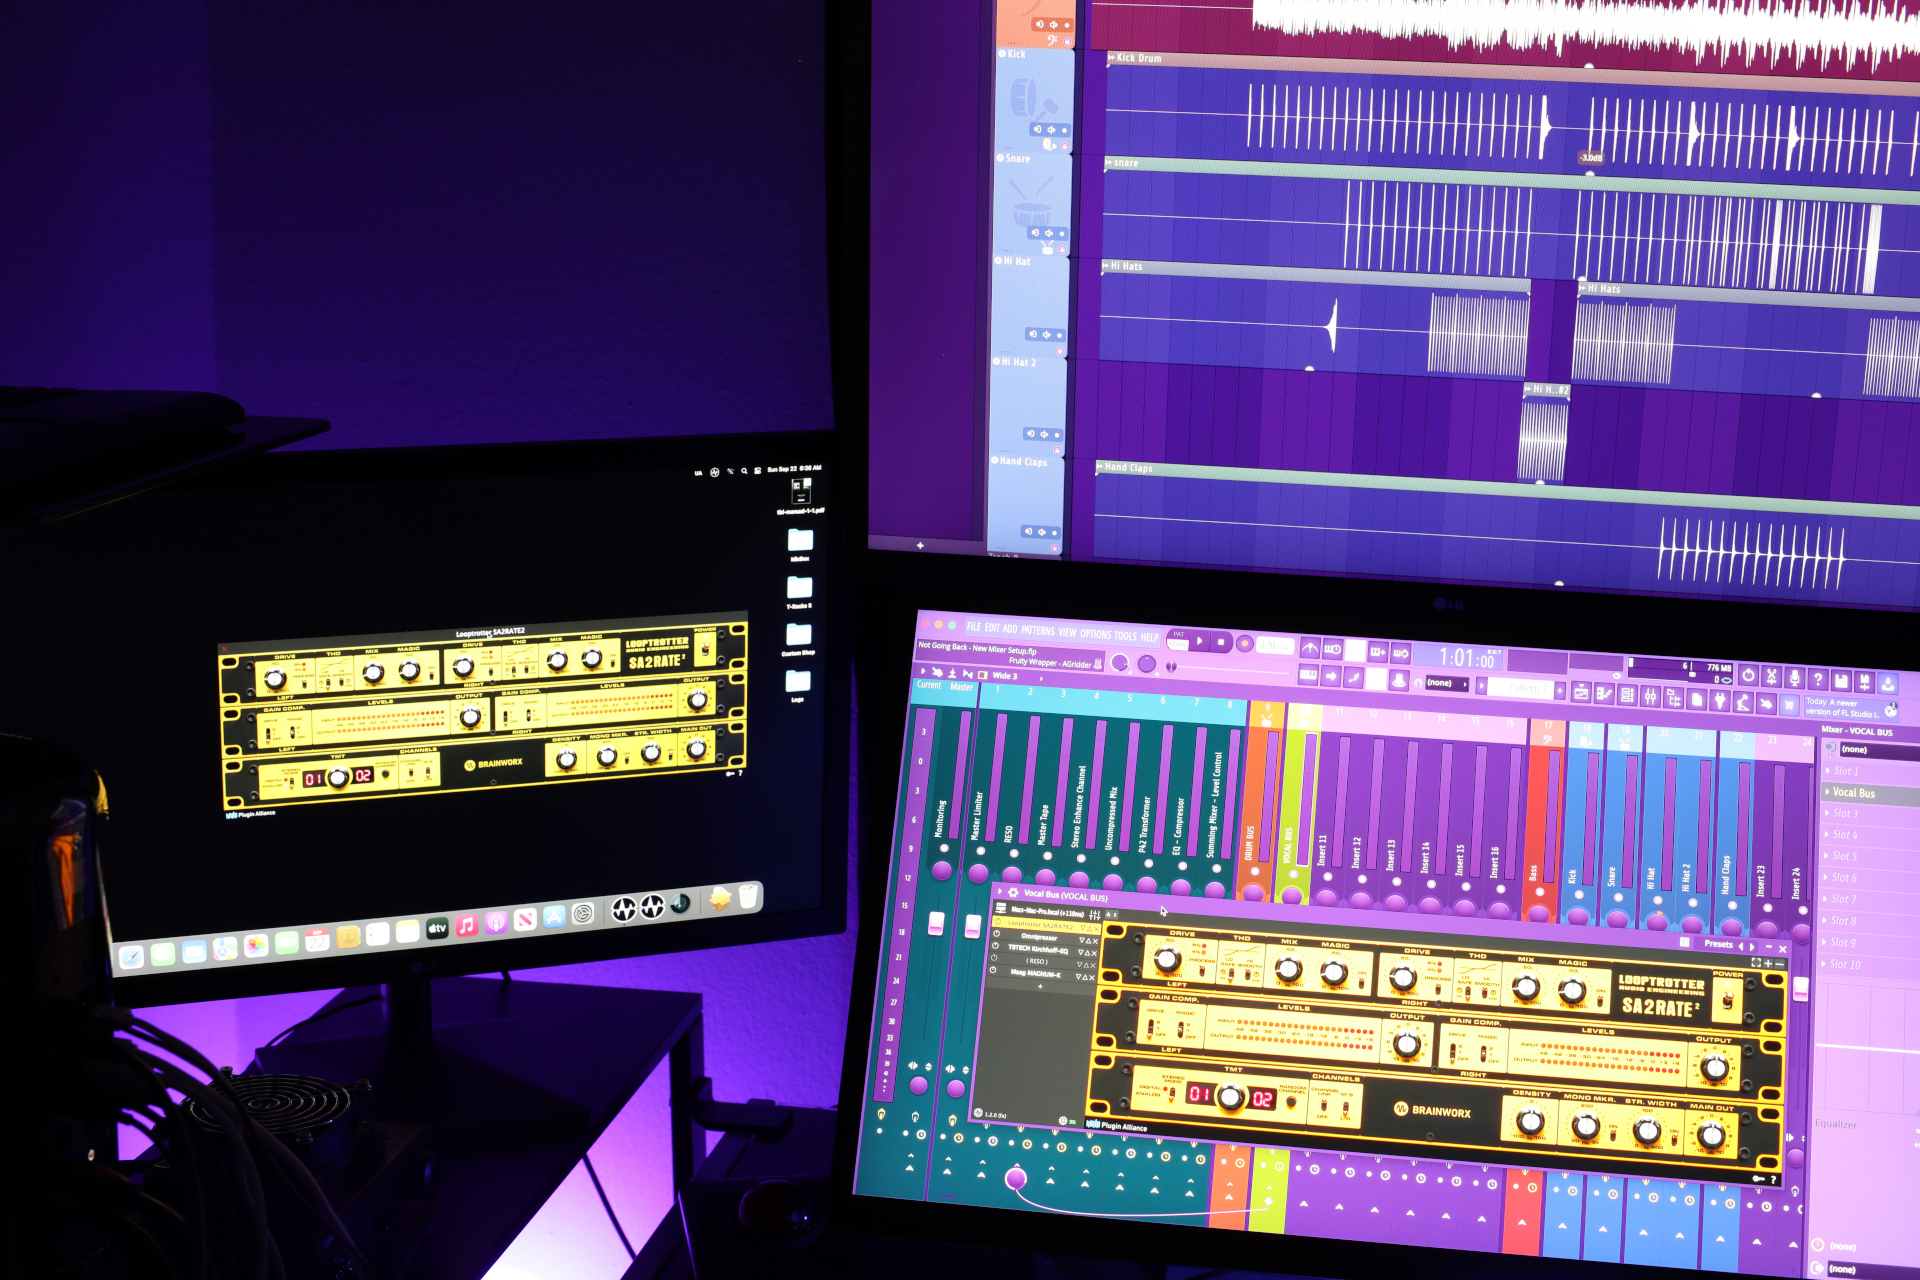
In this picture, we have three screens. The two on the right are connected to my right Apple computer tower, and are what I would call the “main” computer. The left screen is connected to the left Apple computer tower and is my native plug-in server using the software, Audio Gridder.
So, all of my non Universal Audio hardware specific plug-ins are on this second tower computer and networked to the main computer using Thunderbolt 2 cables. This setup gives me a total of 40 computer processing cores to work with when mixing.
Control of the FL Studio software is through a 4k Touch Screen:
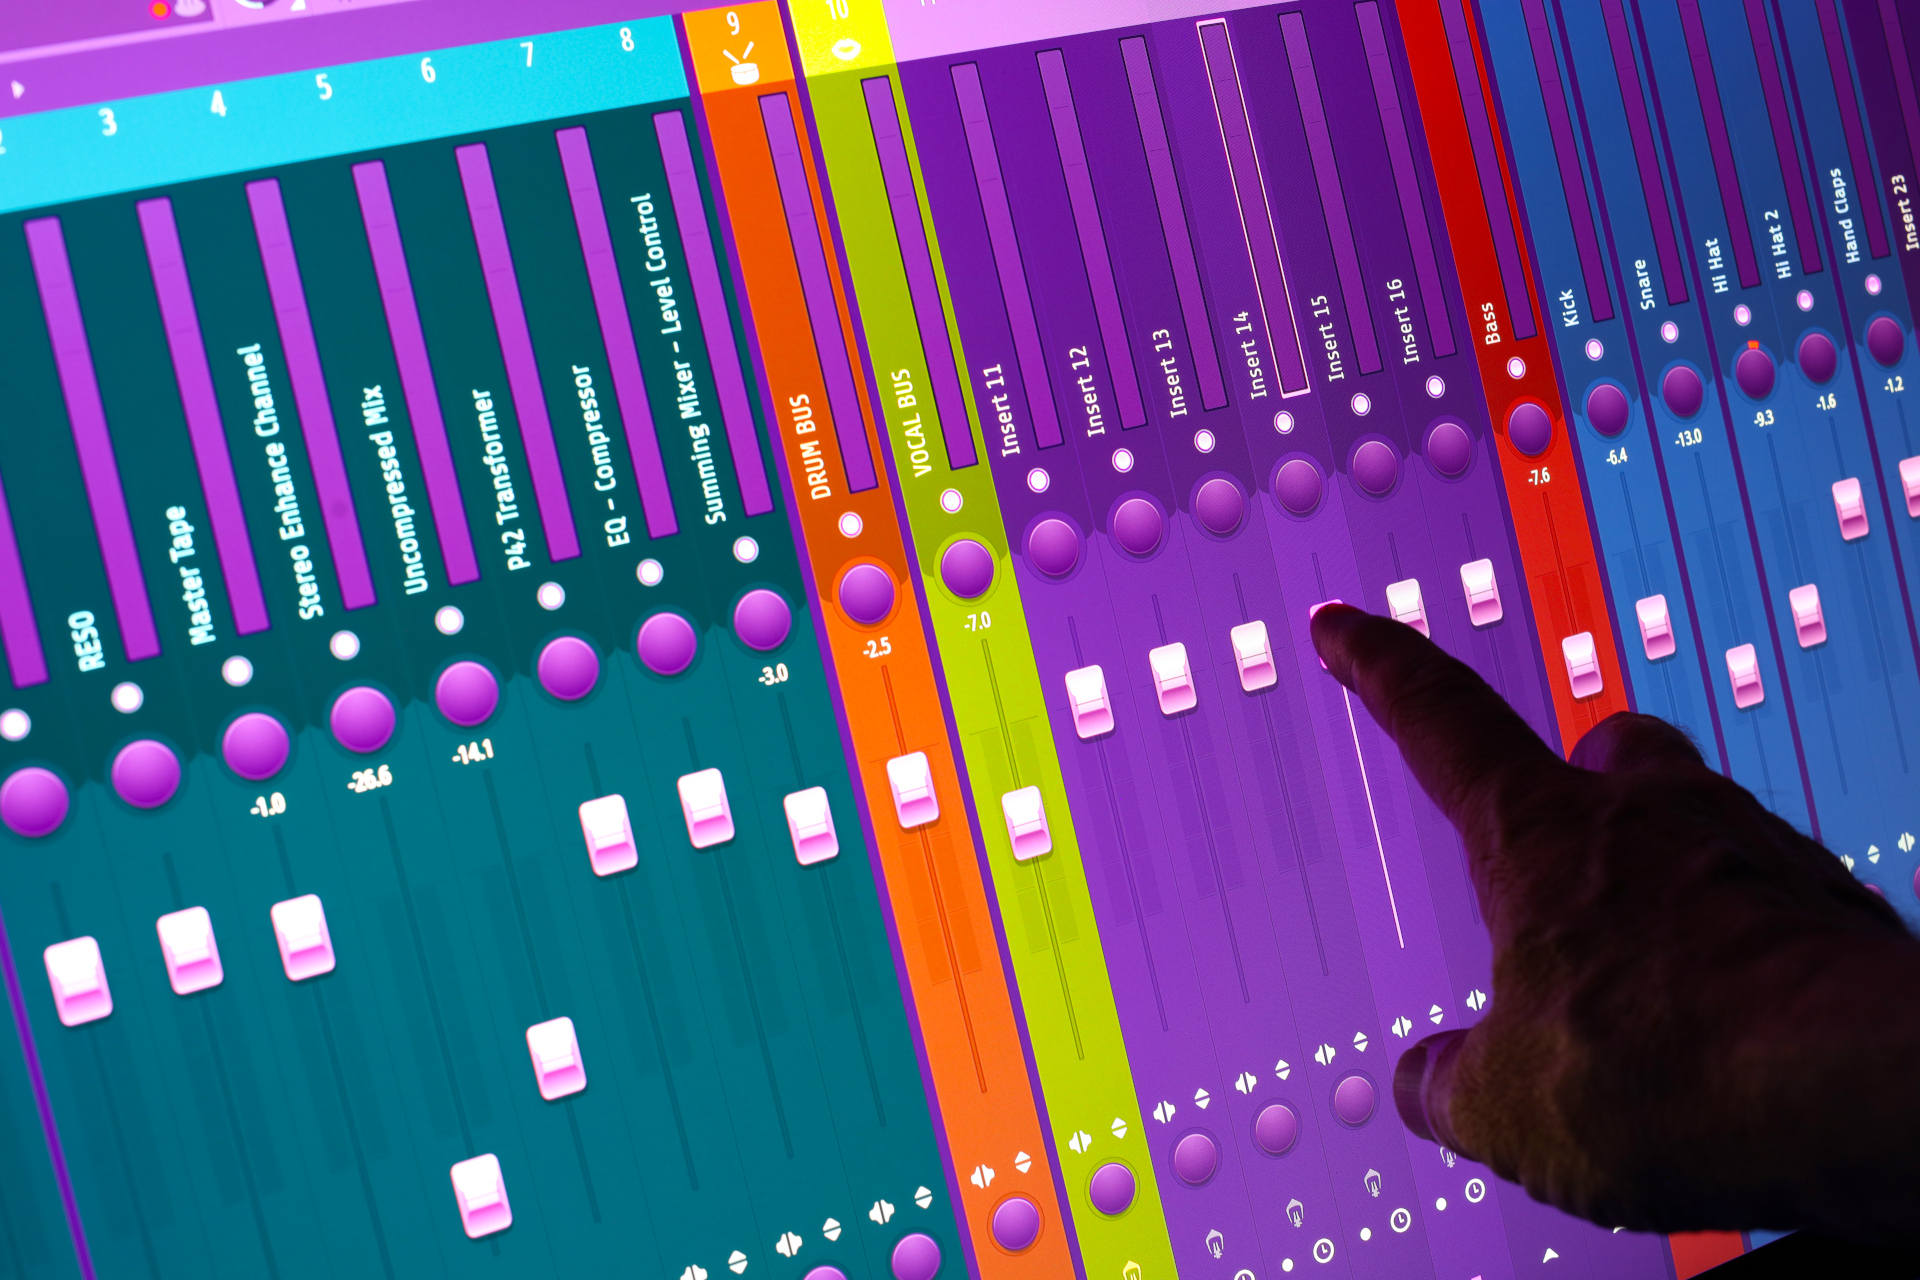
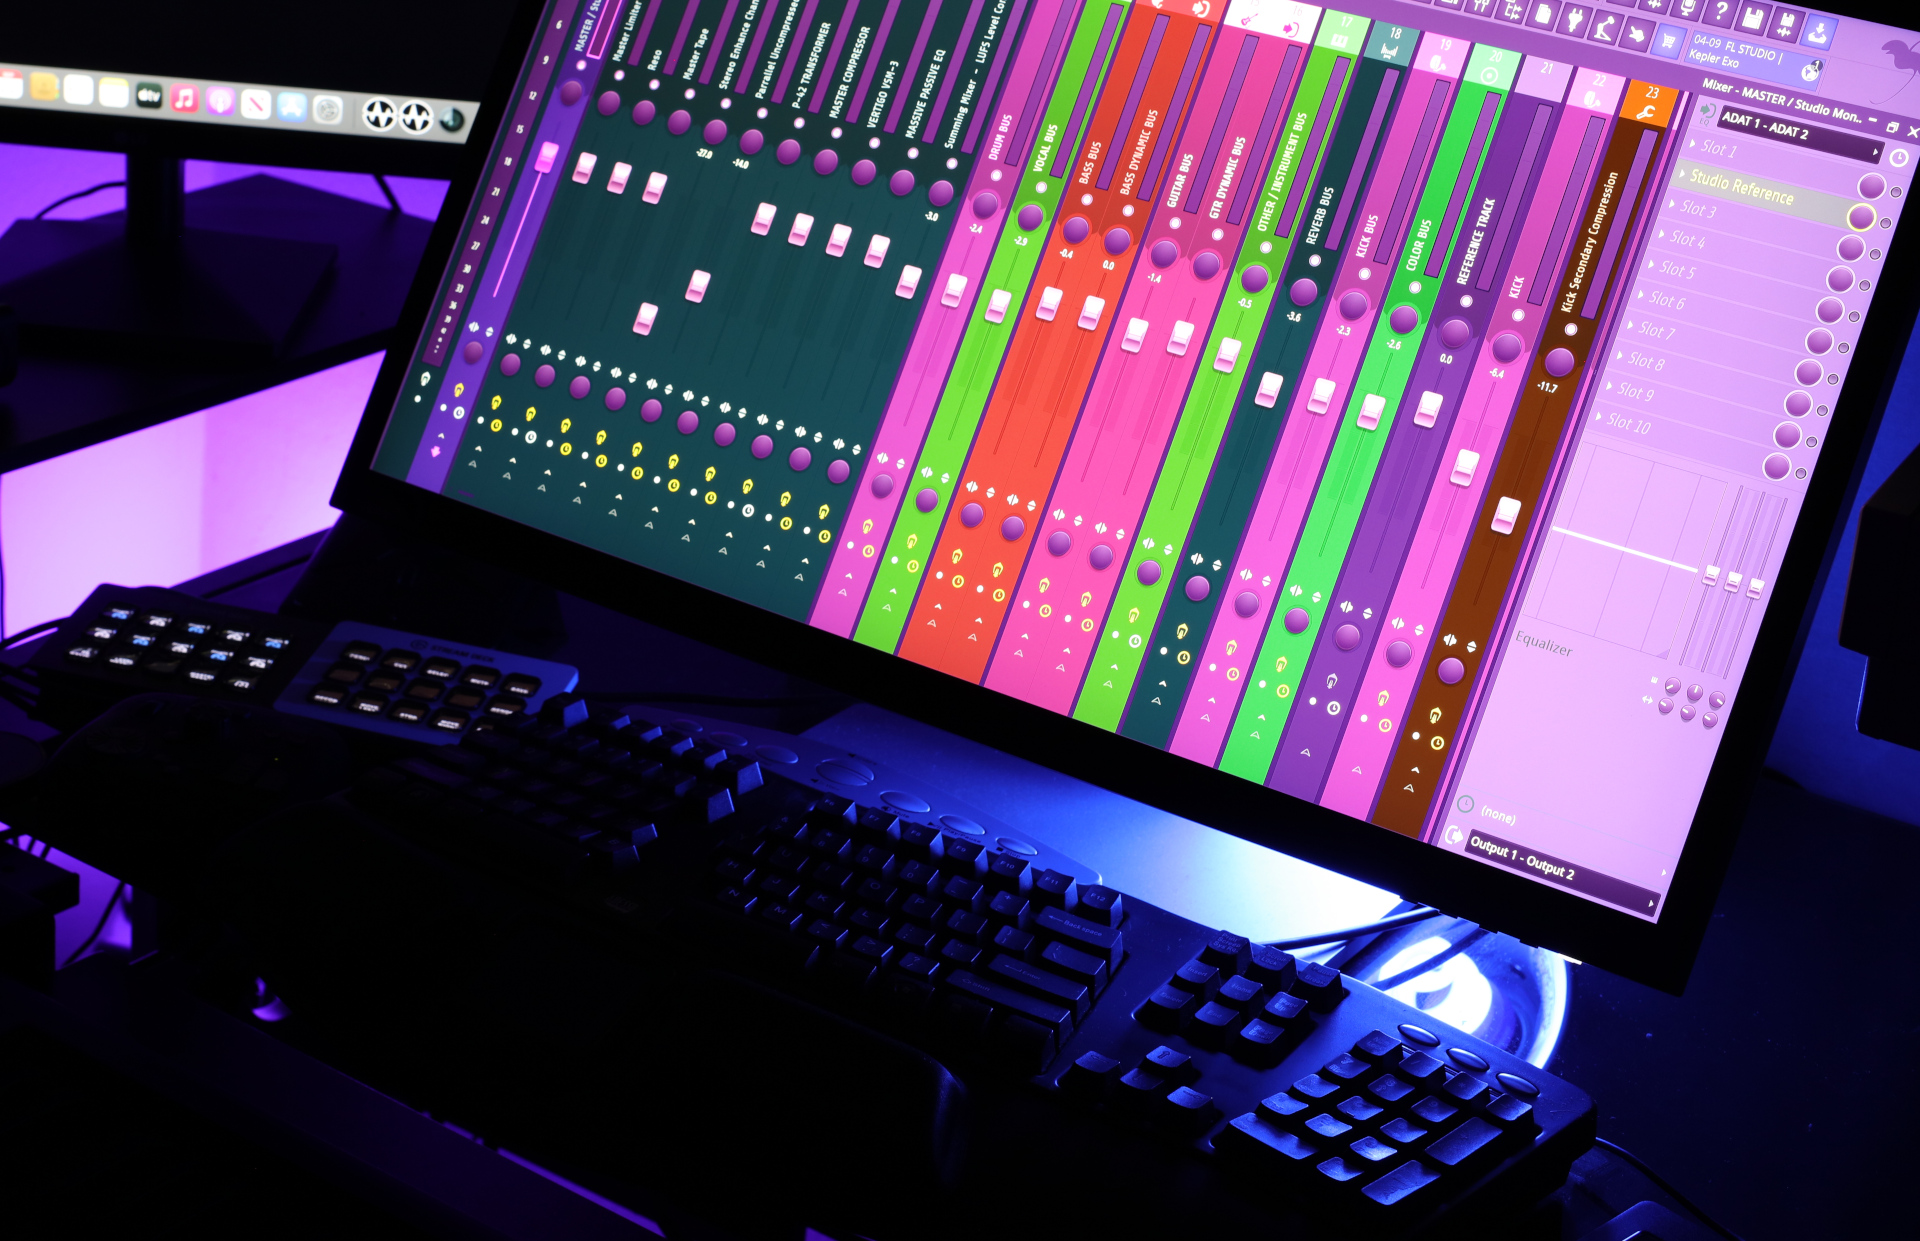
I also use multiple Steam Decks along with my keyboard and occasional mouse:
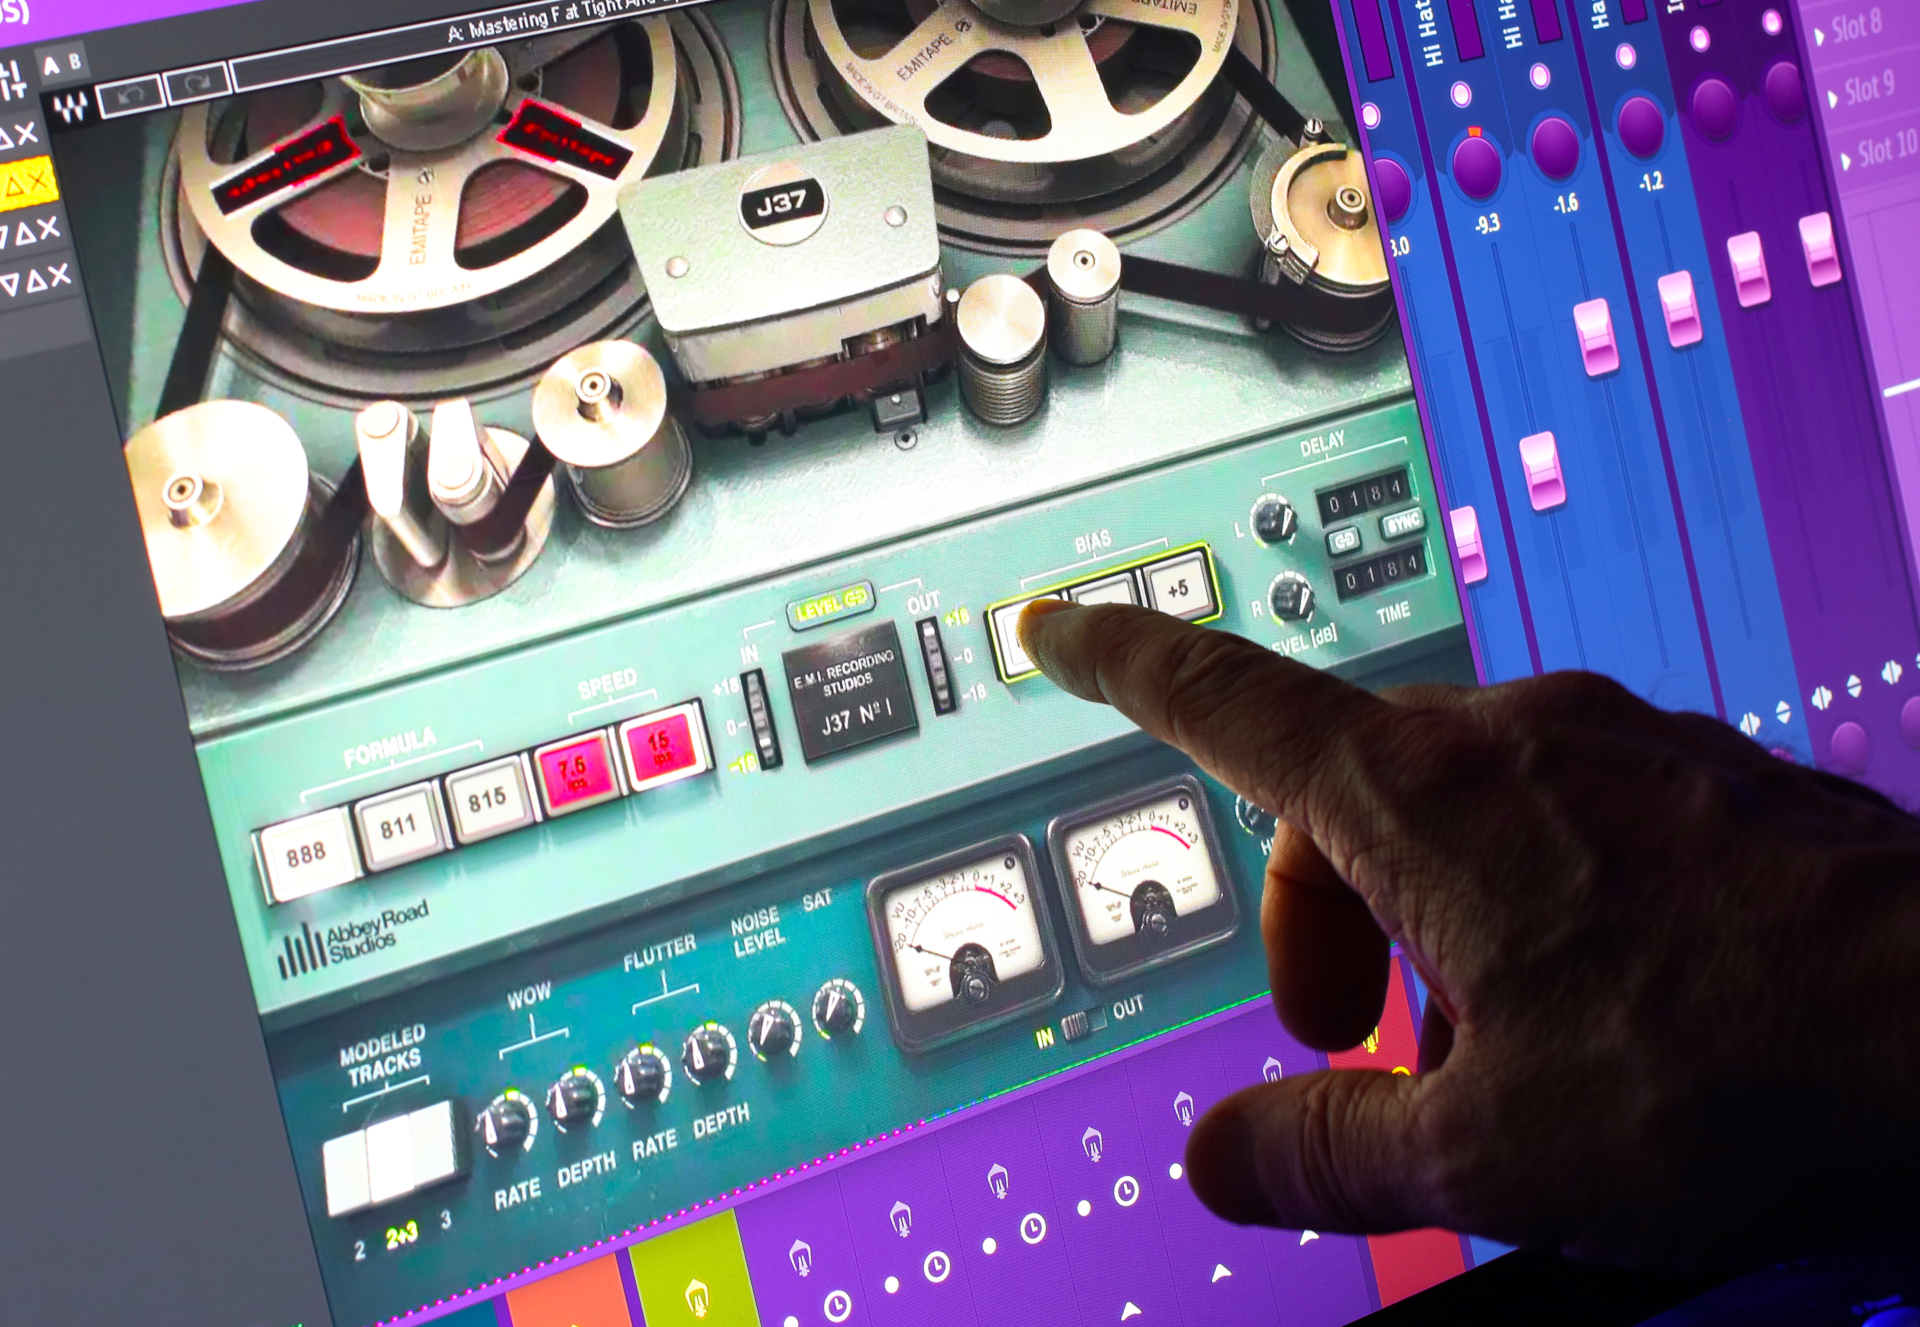
I have found, for myself, that if changes are easy to make, the more creative I can be. I most like the ability to control plug-ins right there on the screen, like the equipment was actually in front of you.
If you are still with me, we have covered the software, the computer, the servers, and the control of all of it. Now, if you would like to wade further into the pool with me, I can show you how I have my template of my DAW setup. To me this is where is gets most interesting.
So let’s talk about the mixer. The DAW. The Digital Audio Workstation.
Today’s digital mixing software provides unparalleled flexibility to design whatever type of mixer you want. The Default Mixer starts out like this:
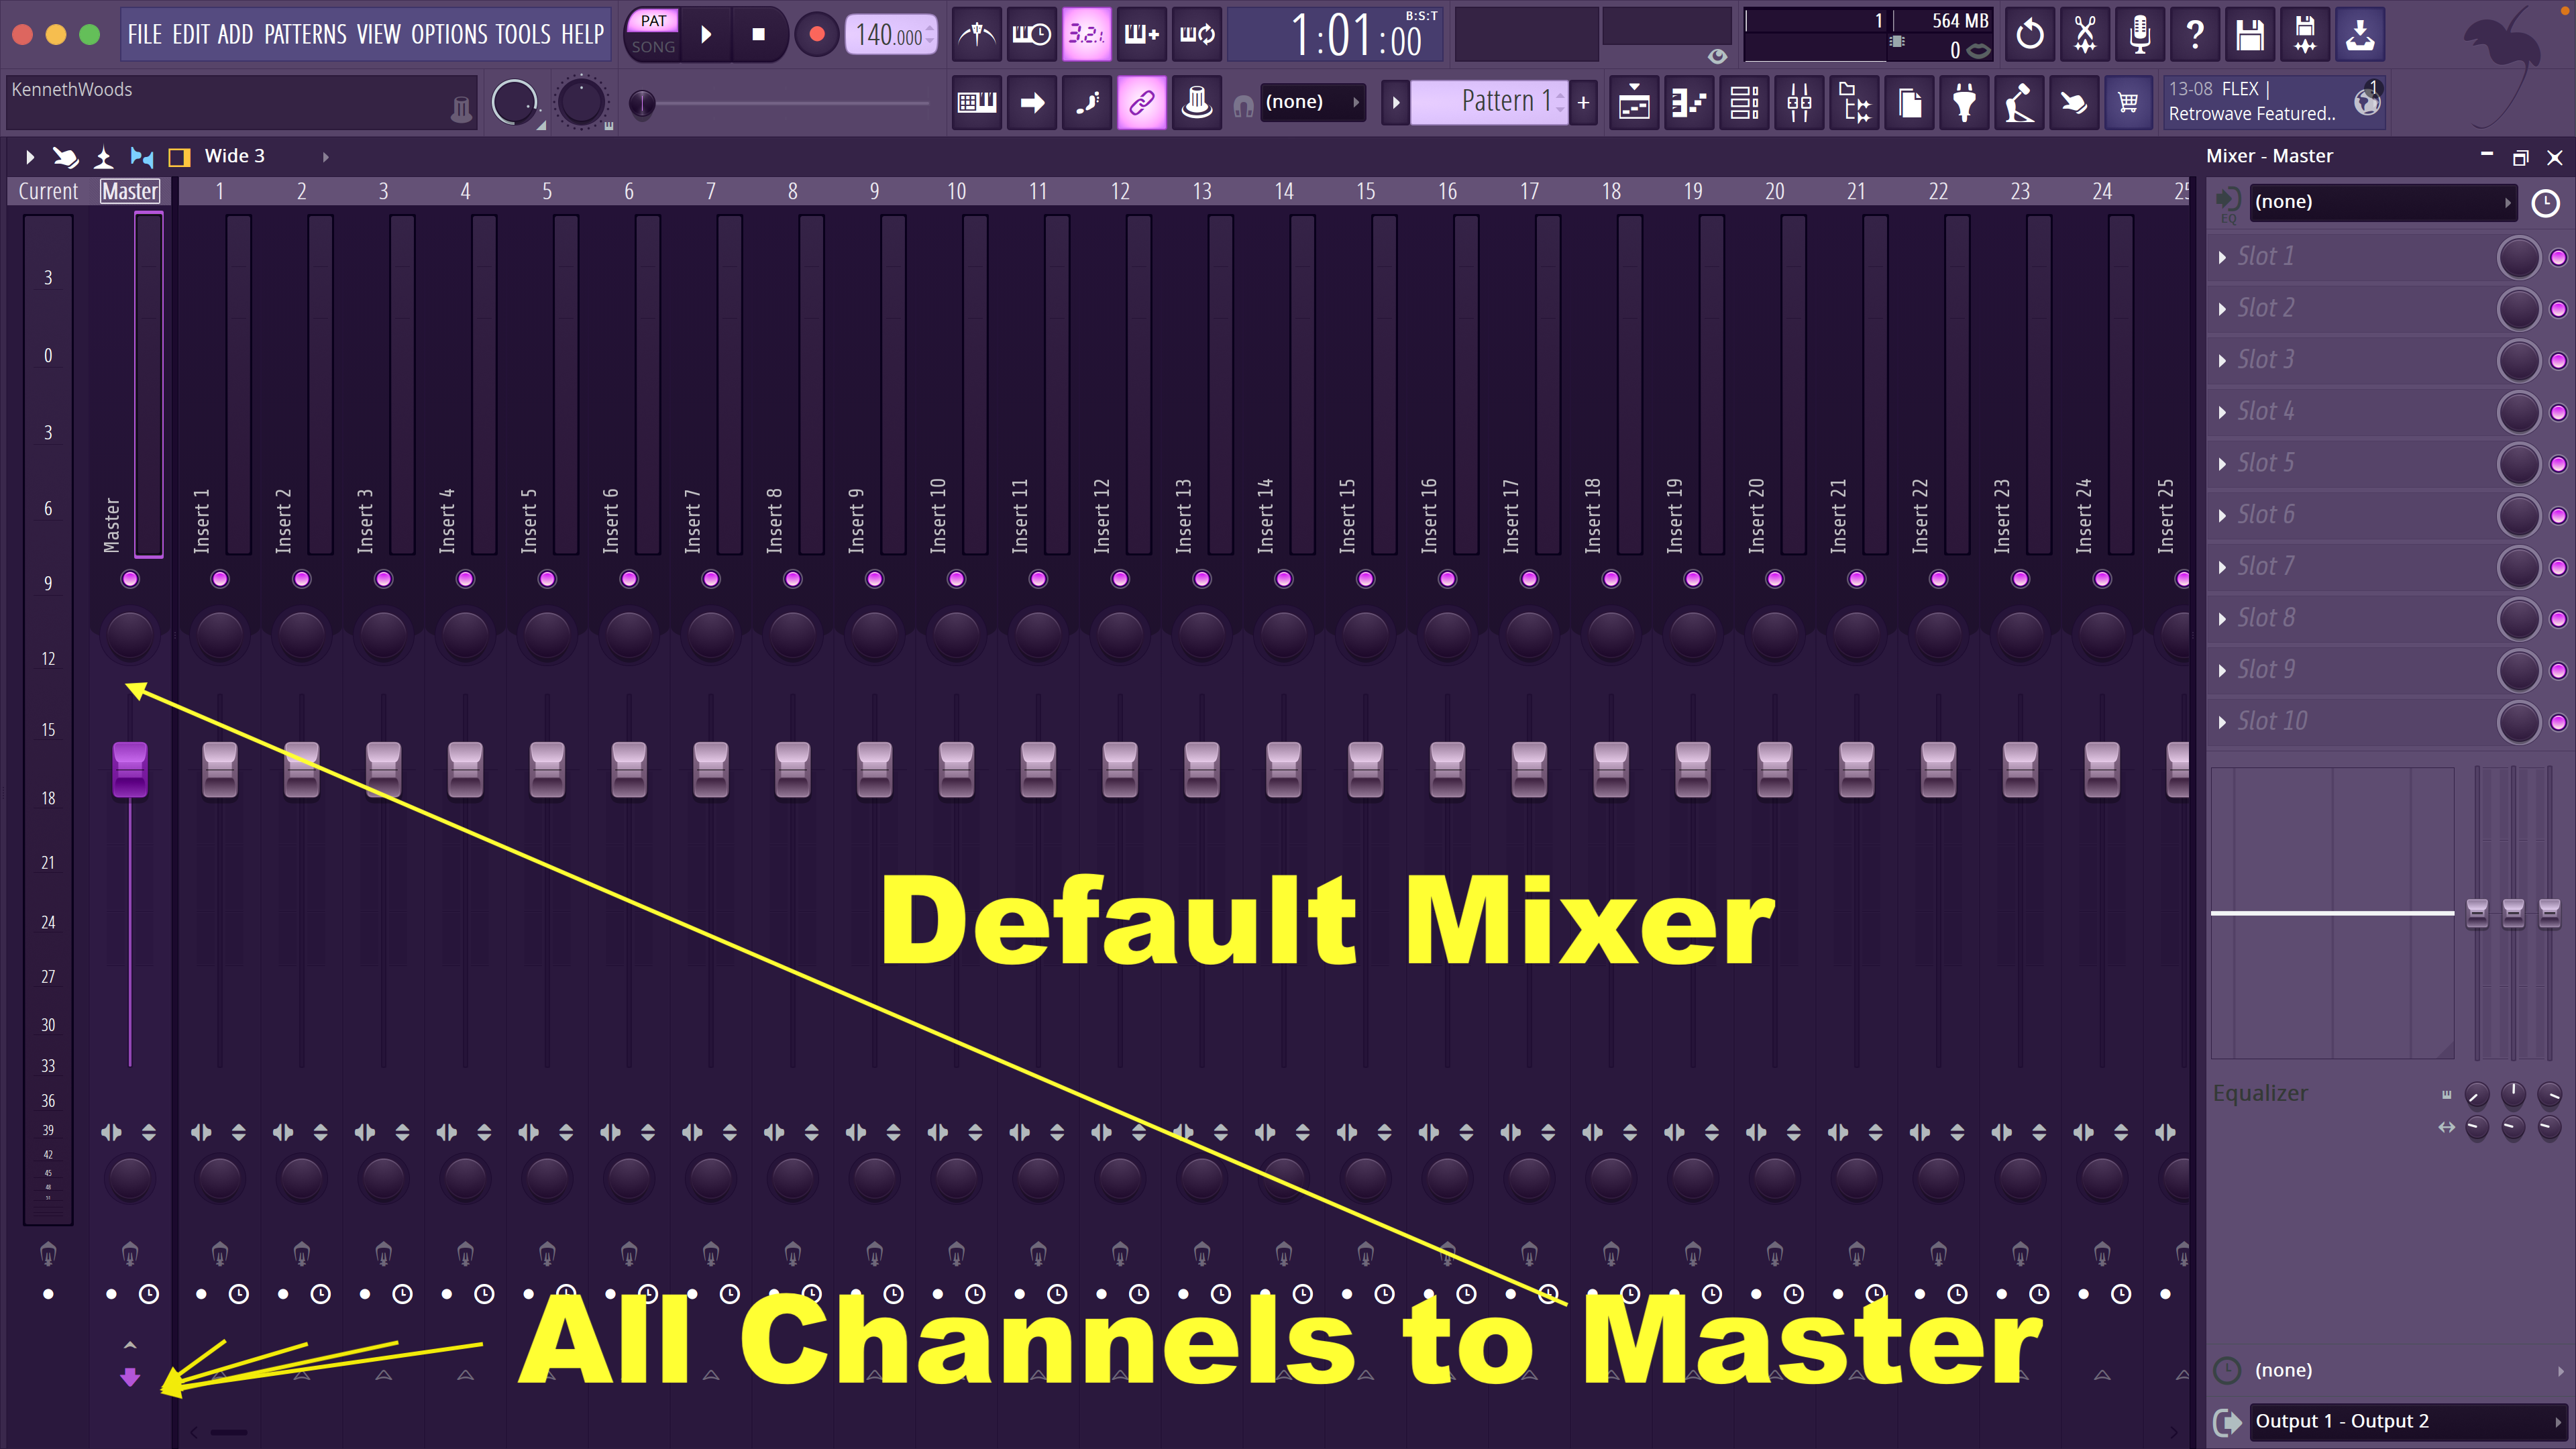
All the individual channels route directly to the master two channel output. There are no sub buses or other types of routing. The next level up in mixing is to use Sub Buses like this:
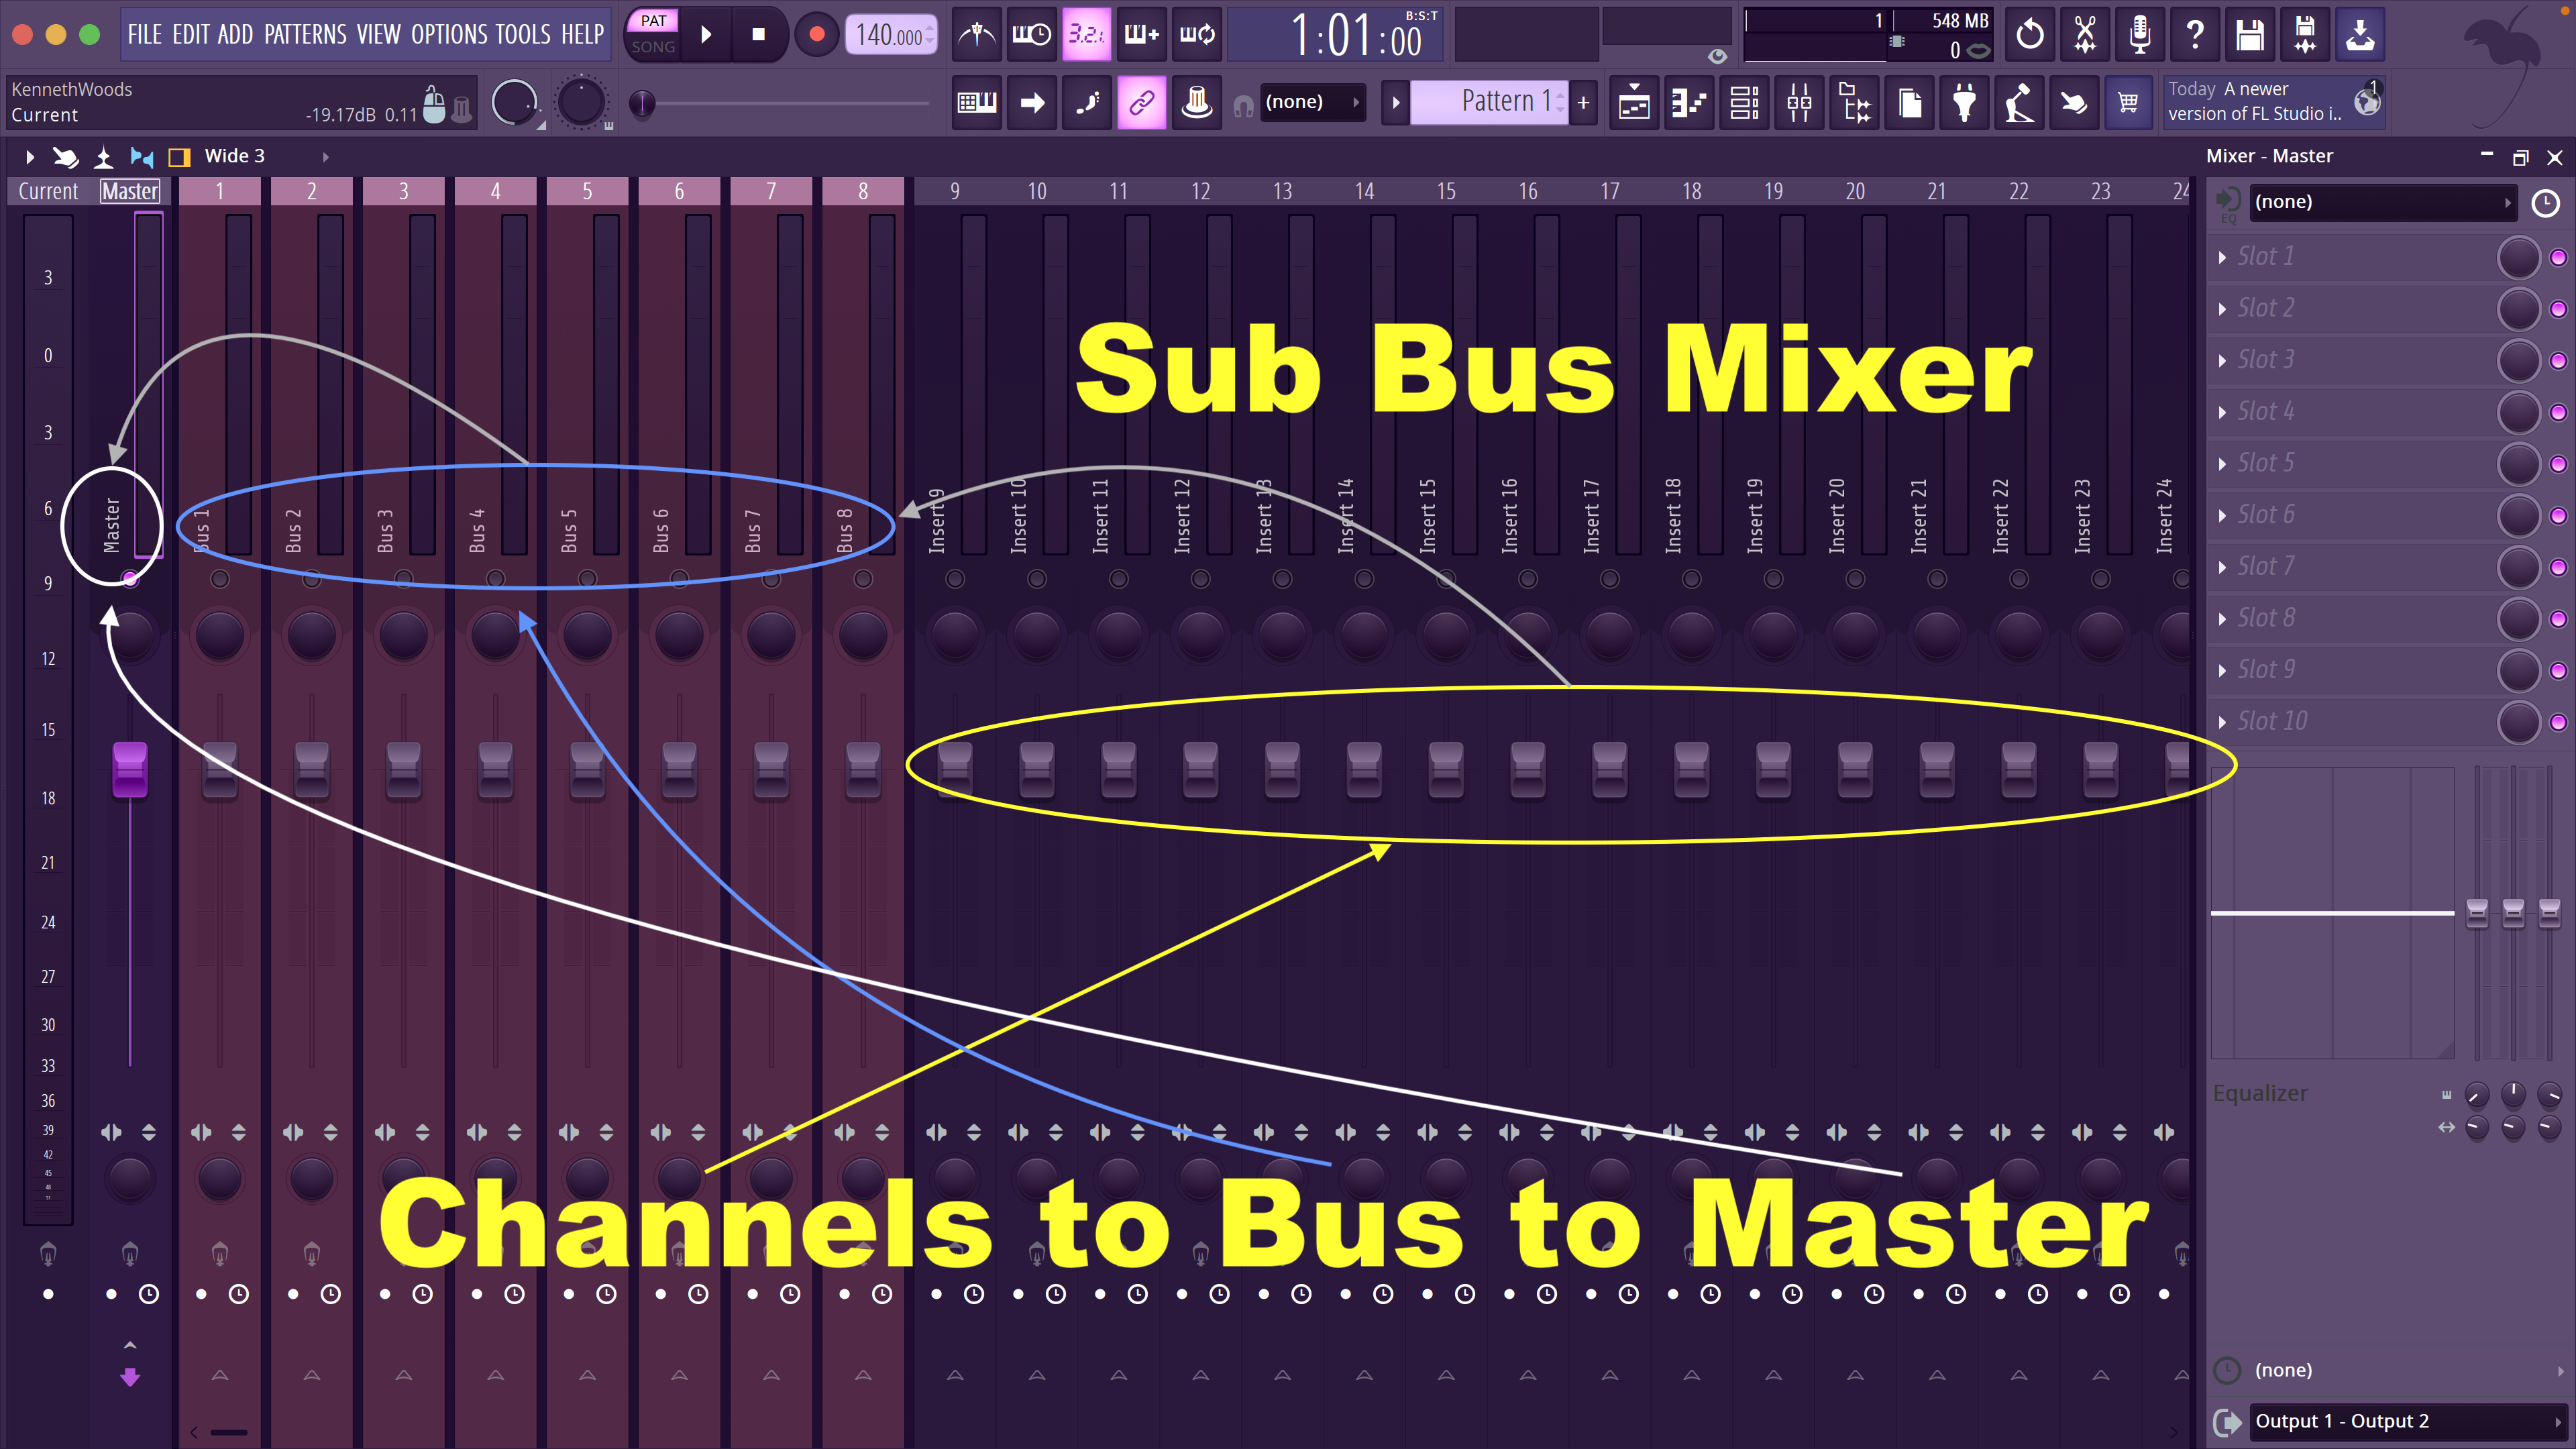
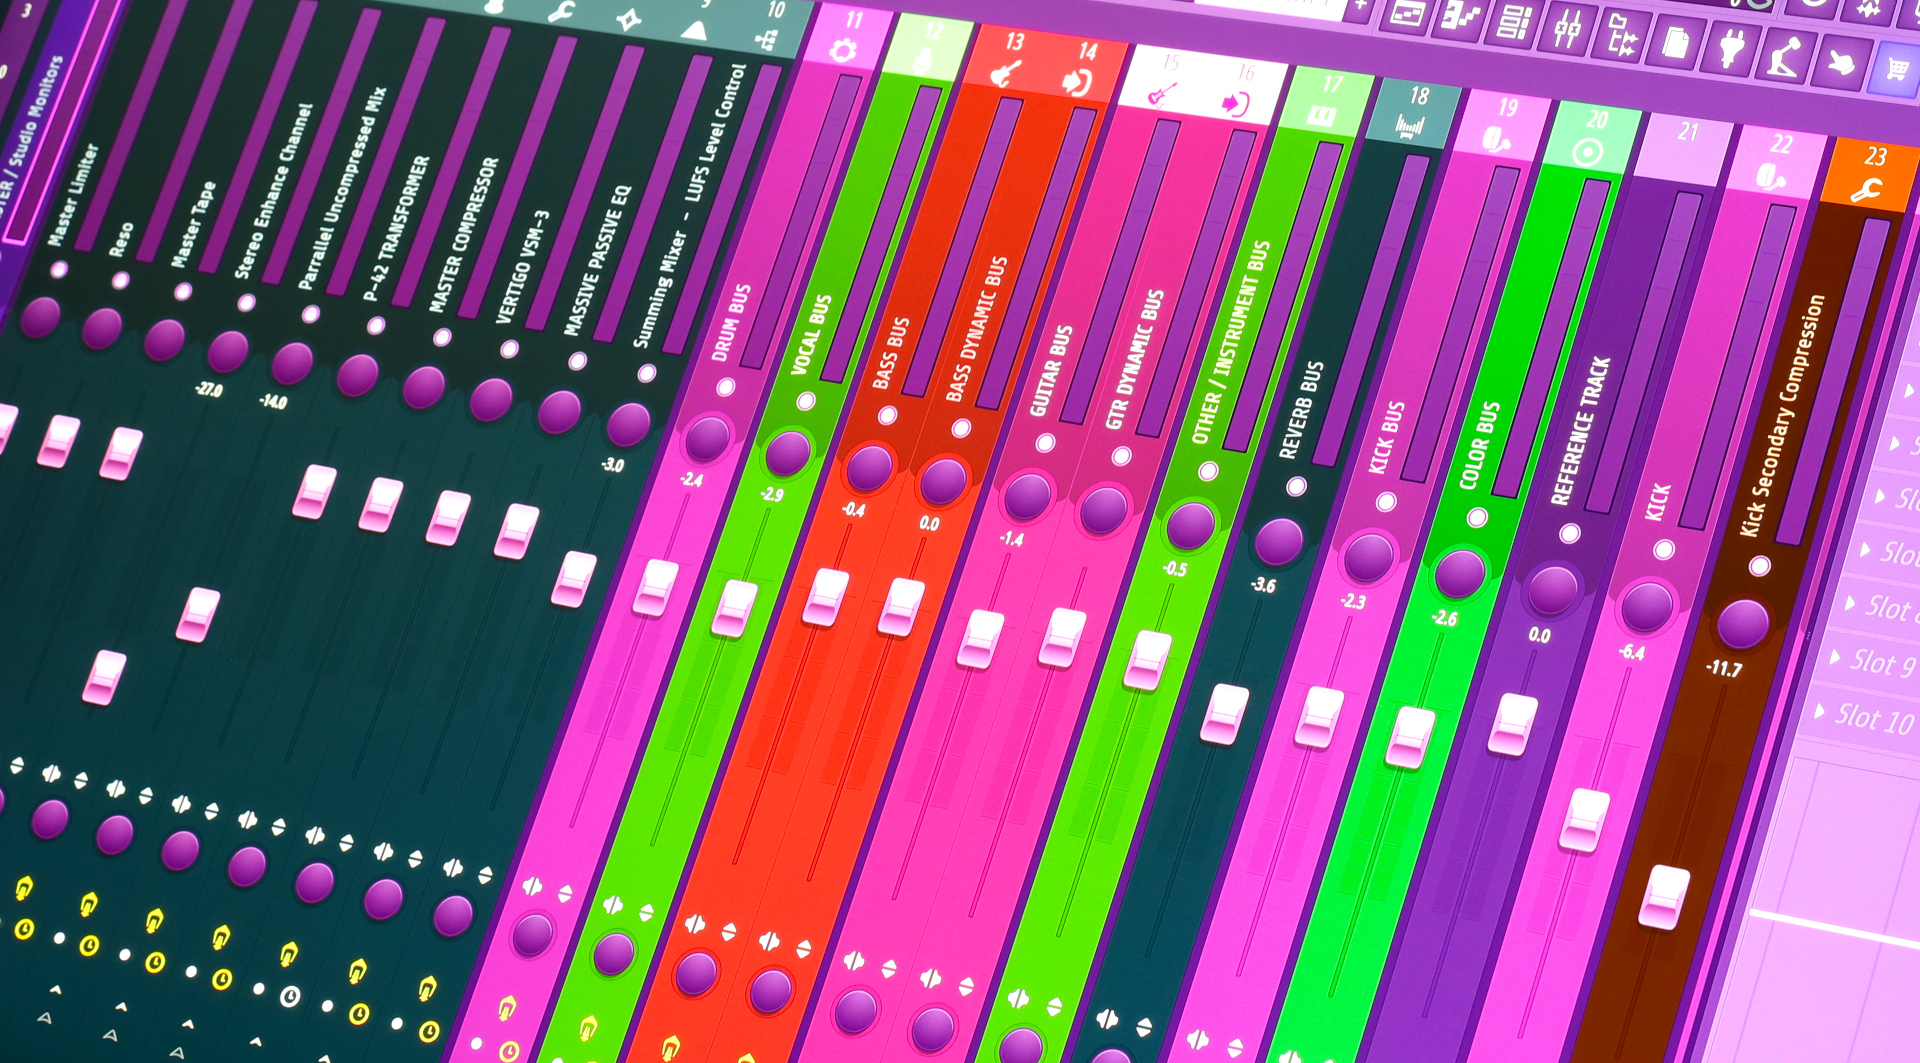
In this setup, parts of the music and broken down into sections, like the drum bus, the vocals bus, string bus, guitar bus, or whatever. The individual channels are routed to a desired bus and that subgroup is now all on one fader, and THEN route to the Master output. Here we can control the level of all of the drums for example, on that single fader, and process that section of the audio all together. This setup is probably the most common out there for mixing, but of course not the only one. (The possibilities are endless.) My personal setup adds a few twist to this eight bus configuration. Let’s start with my eight bus setup:
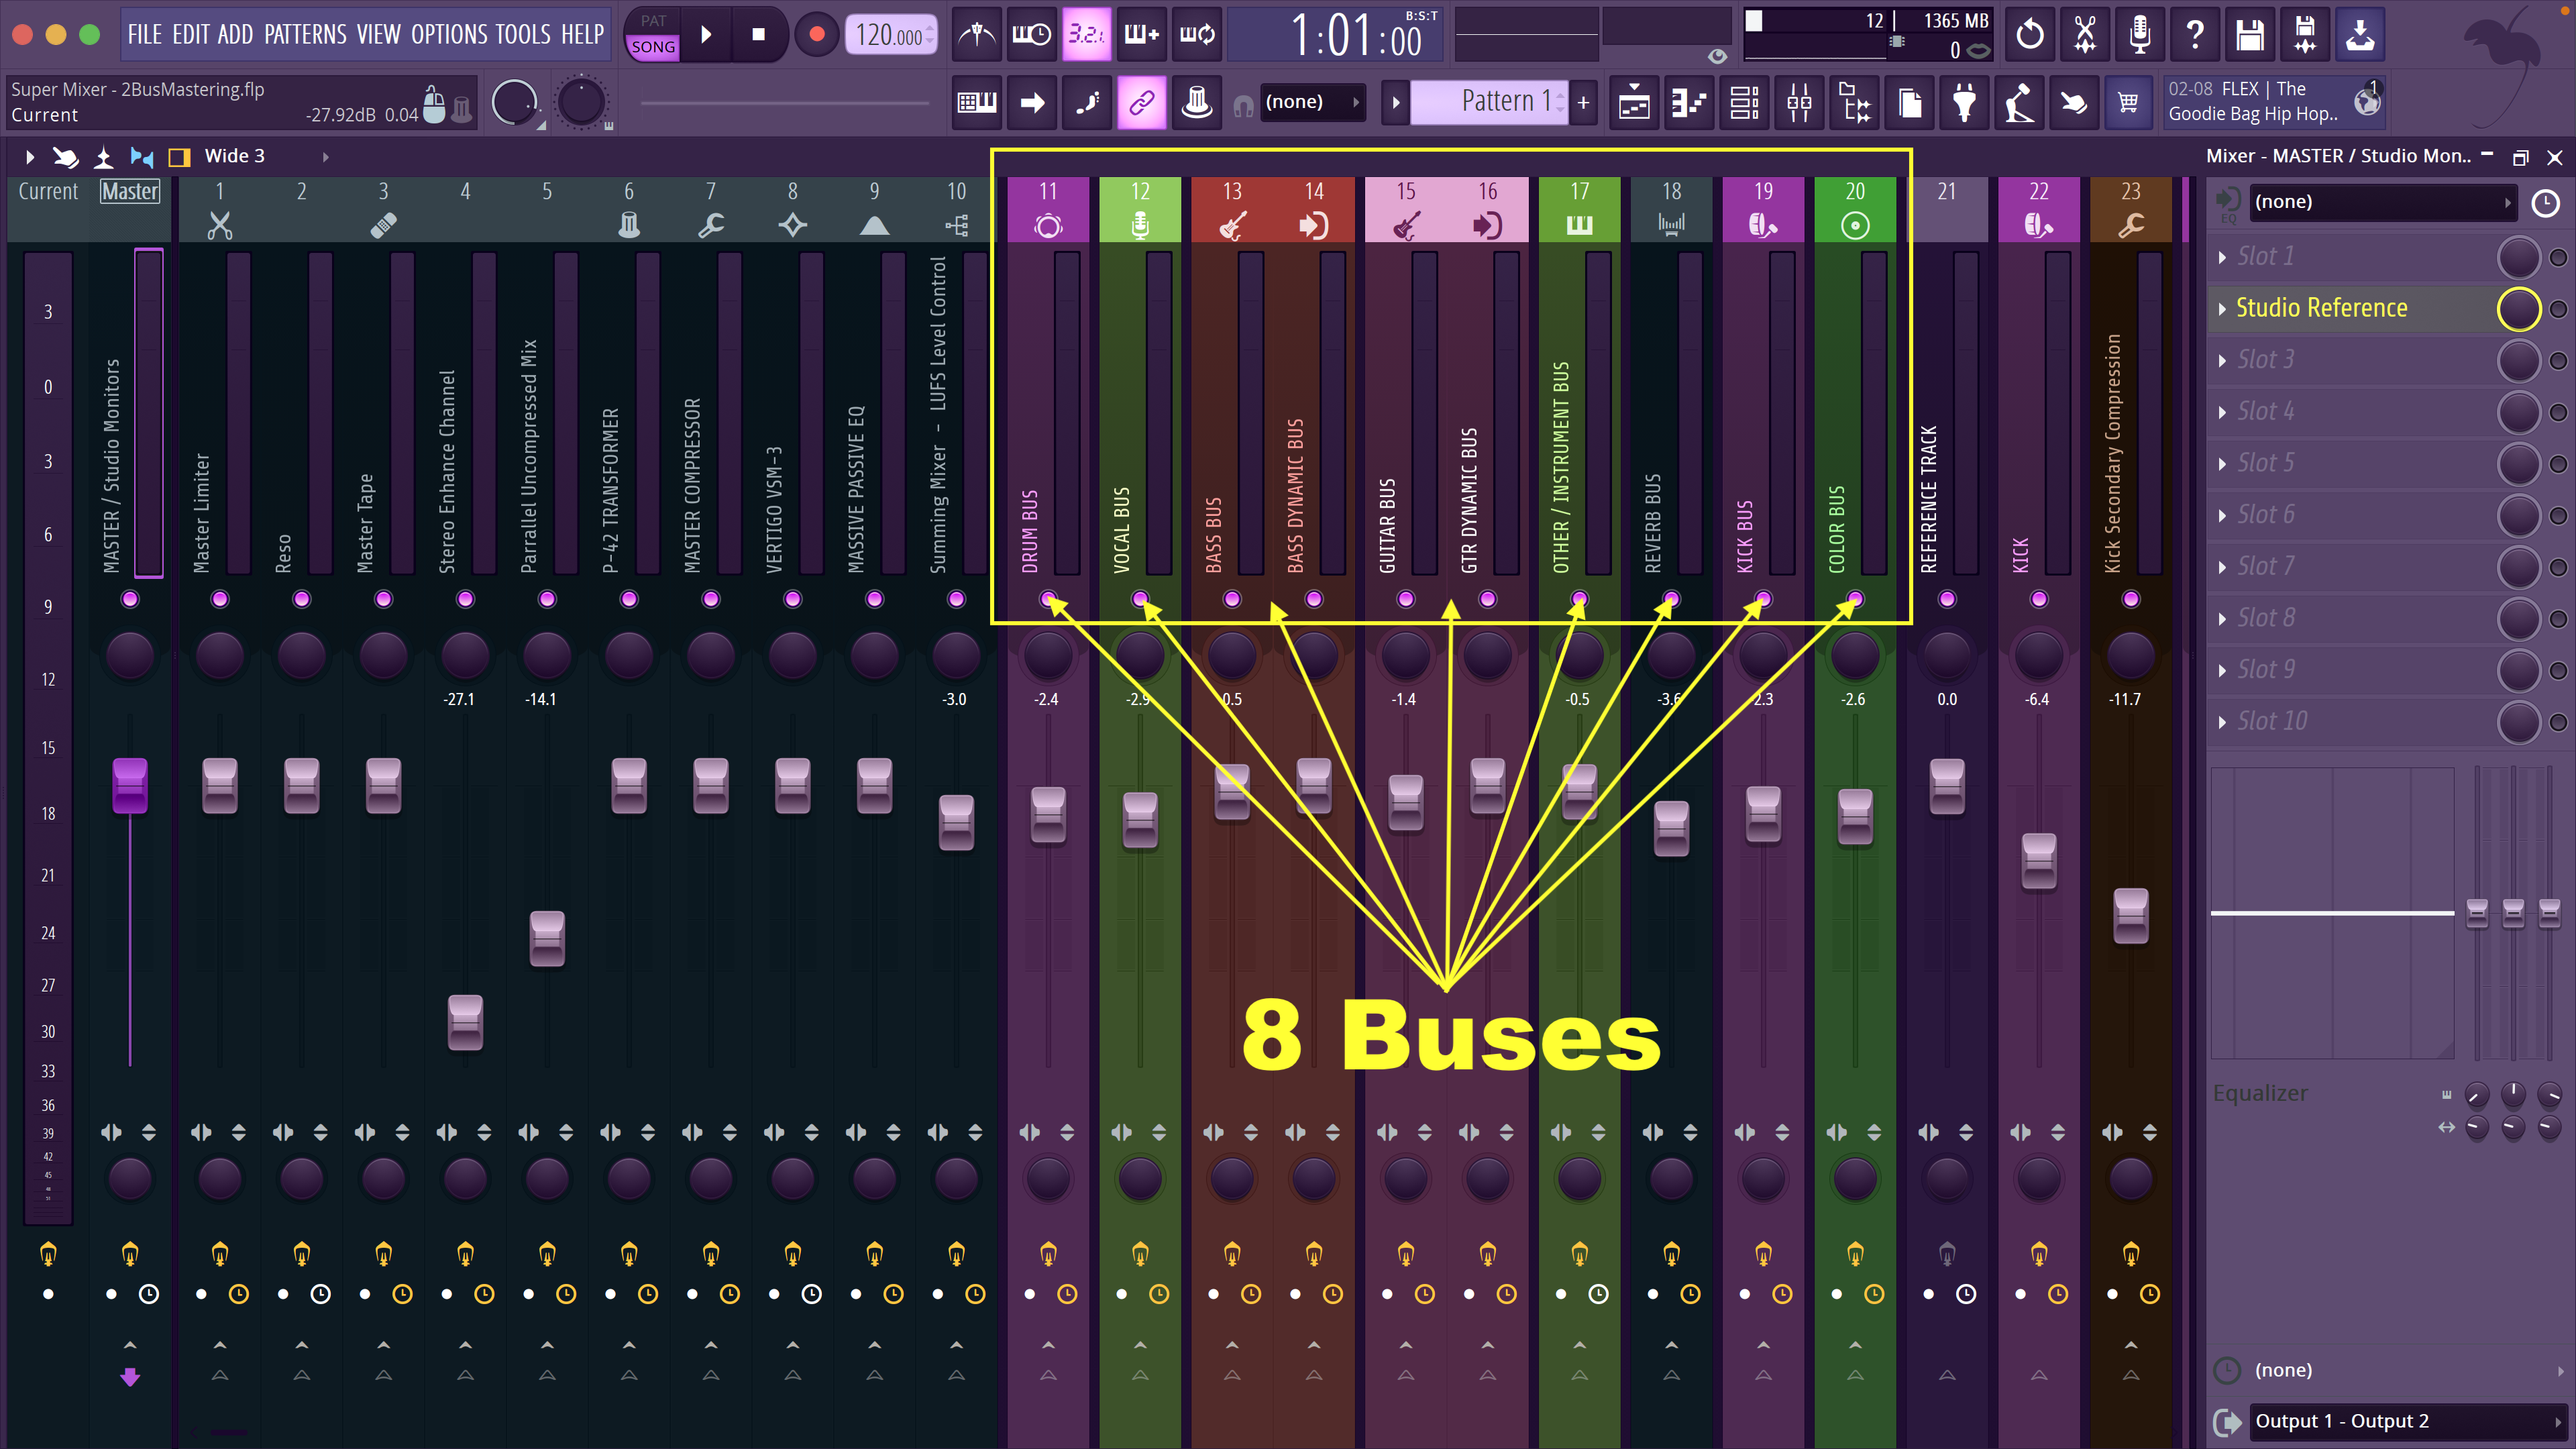
Since it maybe hard to read in the picture, I will list out the buses here:
DRUM BUS
VOCAL BUS
BASS BUS
GUITAR BUS
OTHER INSTRUMENTS BUS
REVERB BUS
KICK BUS
COLOR BUS
As you look at the picture, of the 8 buses, the section to the left of the buses is the Master section of the mixer.
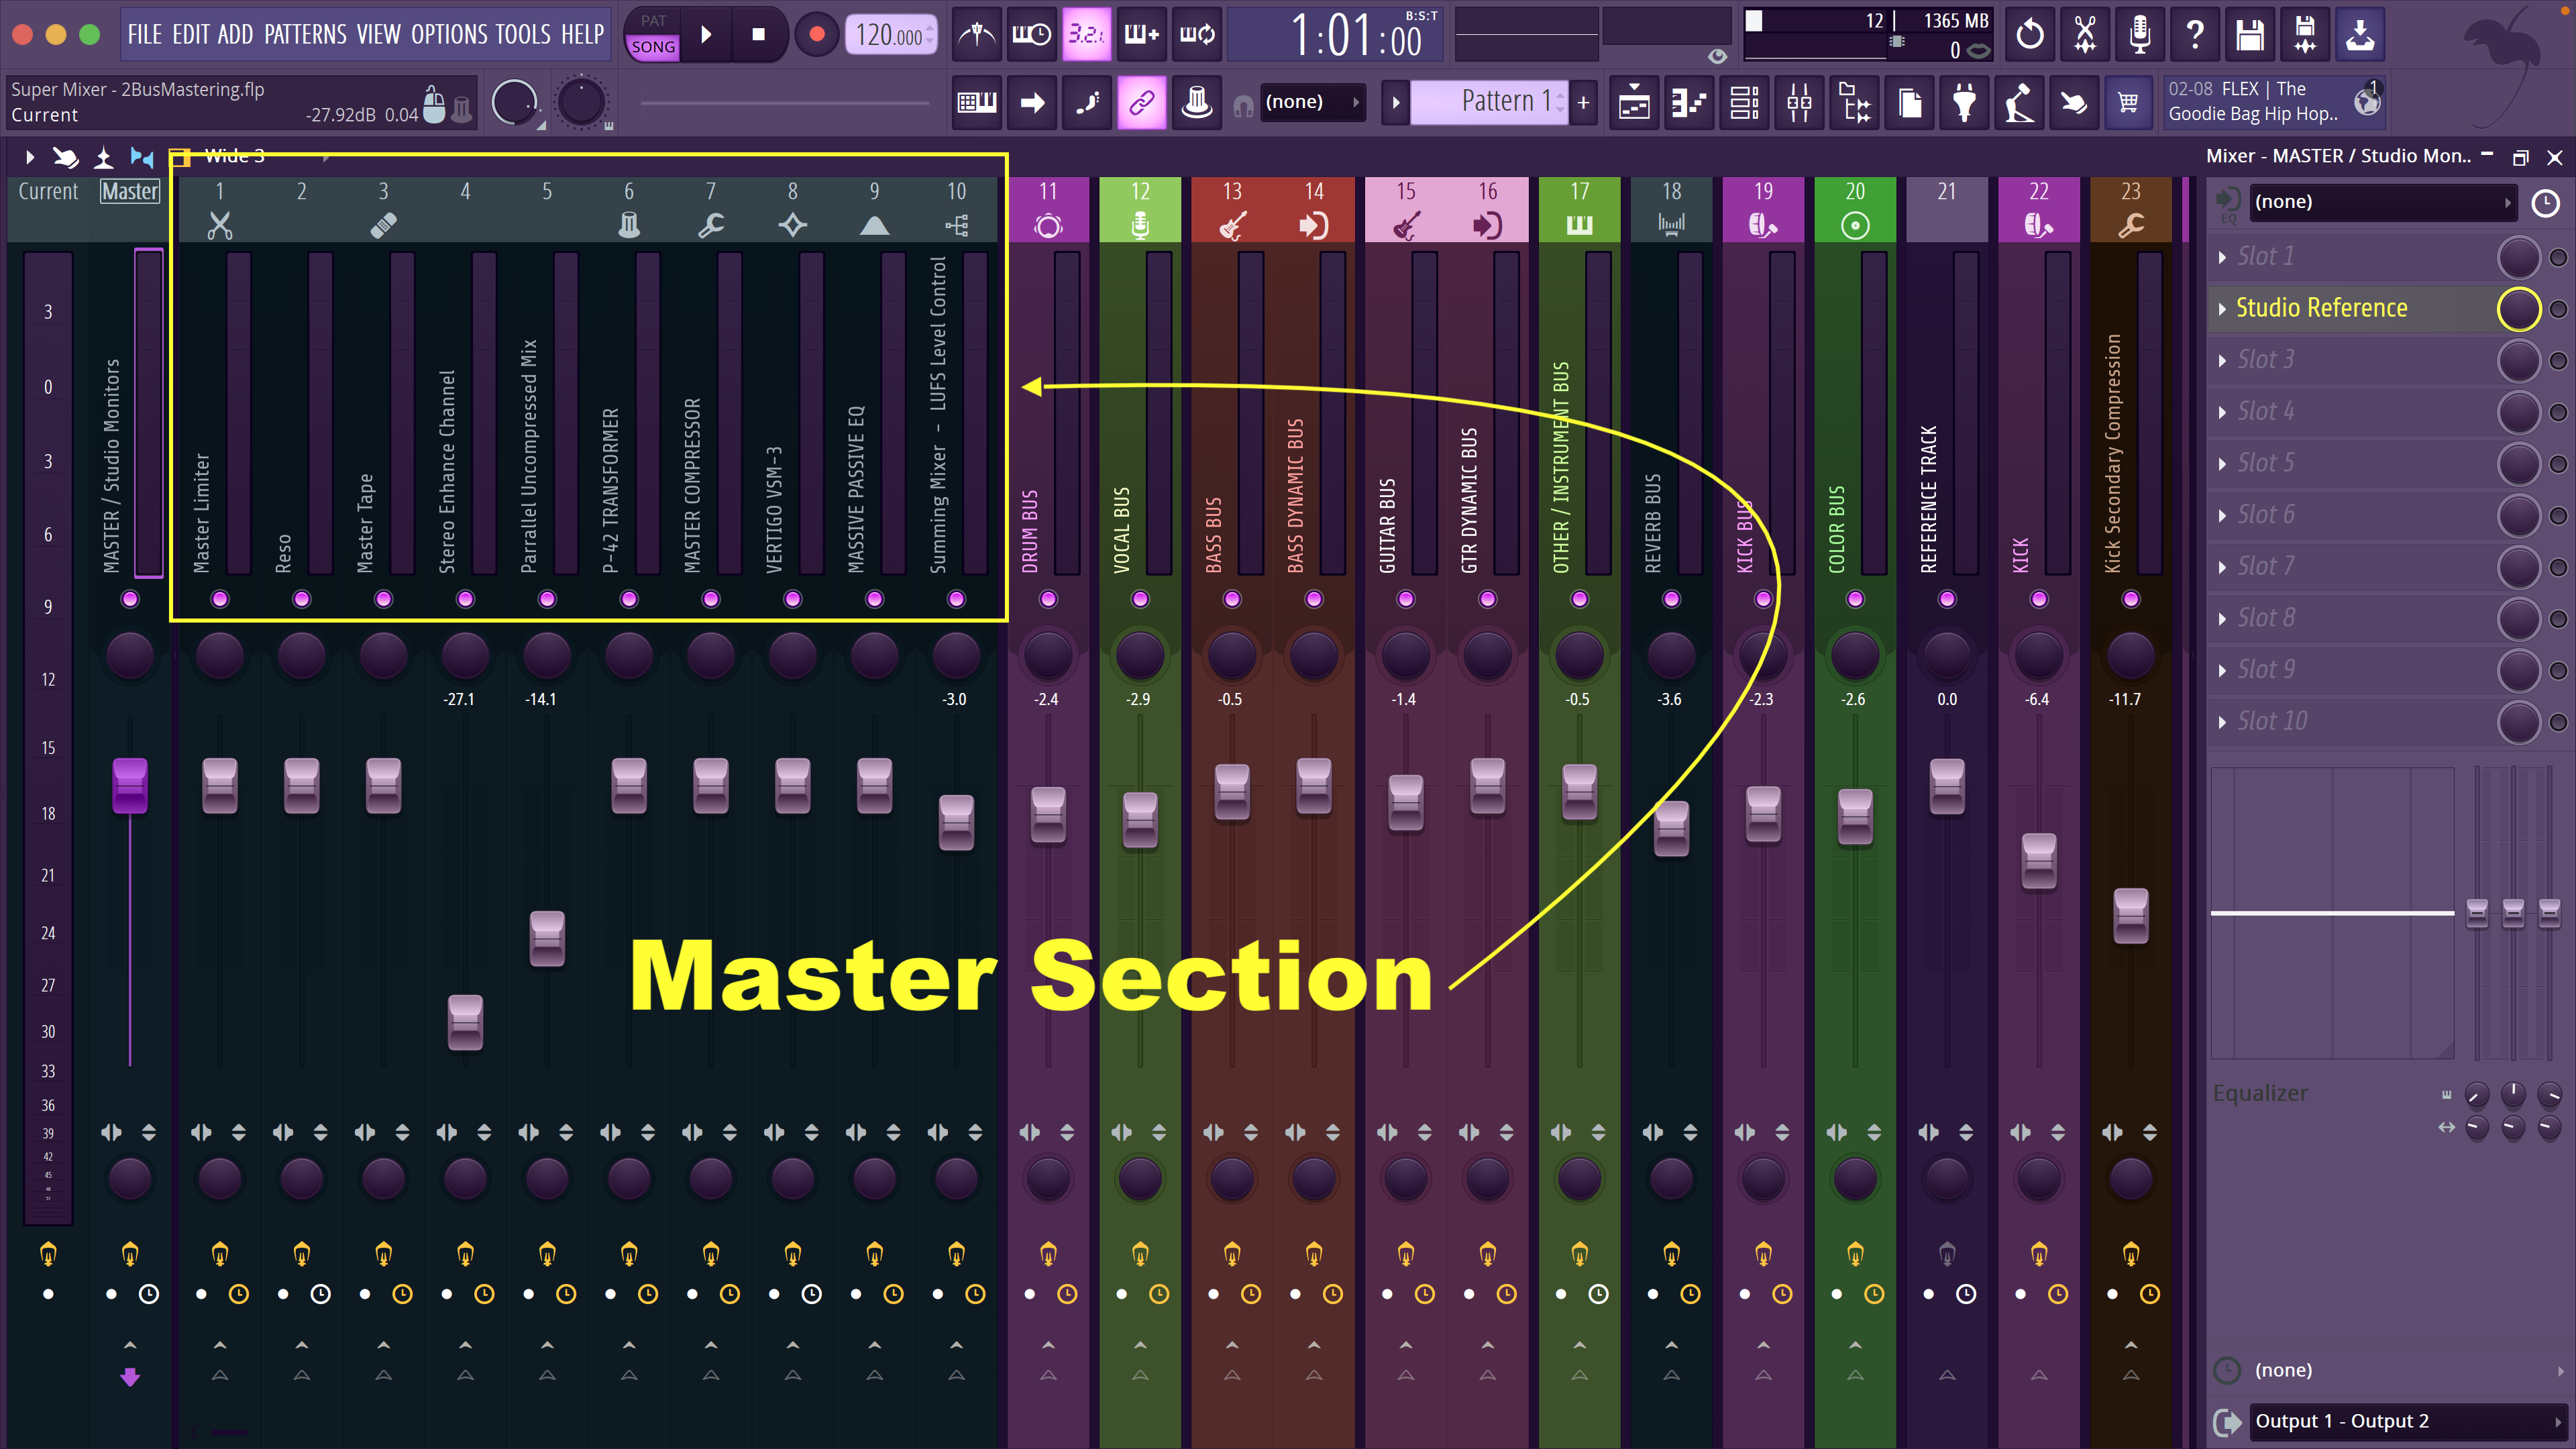
The interaction and connection of the 8 buses to the Layered Master section is where things get more complicated.
Are you still with me?
If you are, then let’s start with the Kick Bus that routes to channel 10, the Summing Mixer. This is where most of the buses enter the Master section.
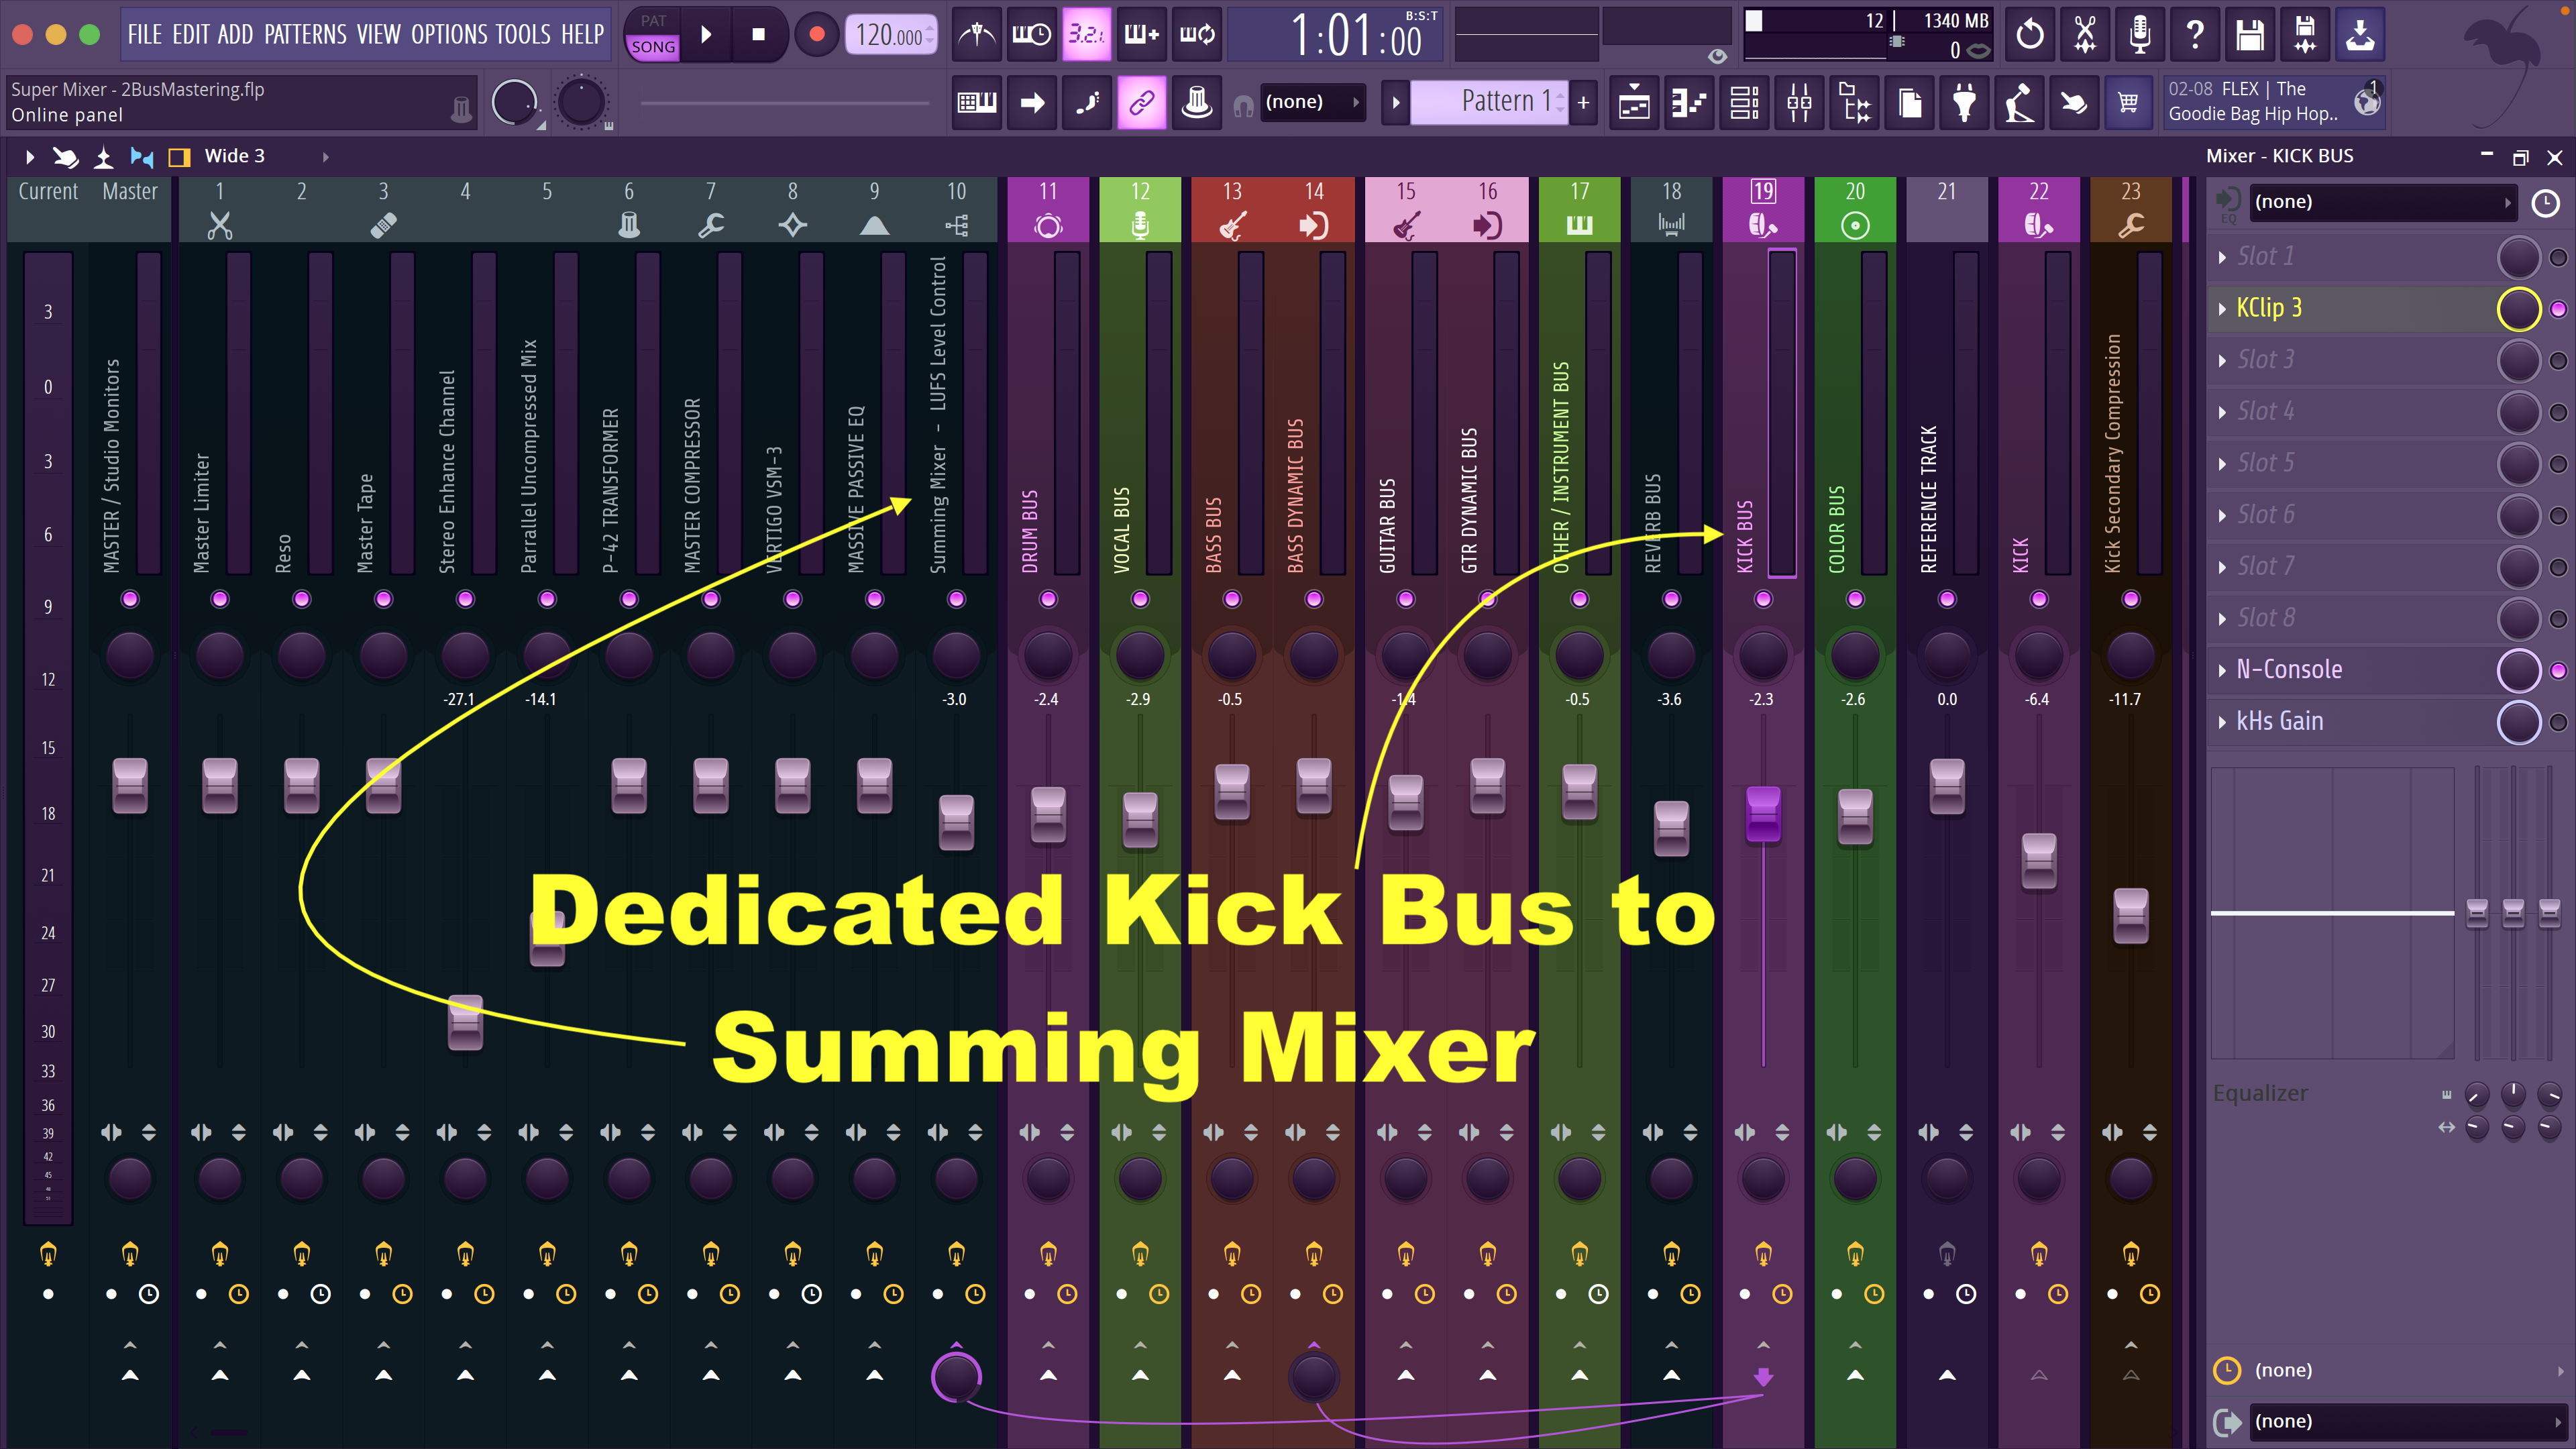
Note: as we look at these routings, the connections between channels is shown at the very bottom of the mixer. You may want to open images on another tab, by right clicking them, or zooming in on your phone screen.
Cool, thanks for the tip, but why isn’t the Kick just routed to the Drum Bus?
The Kick Drum is a critical part of modern pop music and can be one of the loudest instruments in the mix, so I like to separate it’s processing to a separate bus. Here I can apply compression and clipping to the Kick before it enters the Master section. This can help prevent the pumping of the audio running through the Drum Bus, or the whole mix, trying to compress and limit the Kick in either of these other signal chains.
Nice, you said channel 10 is a Summing Mixer, why?
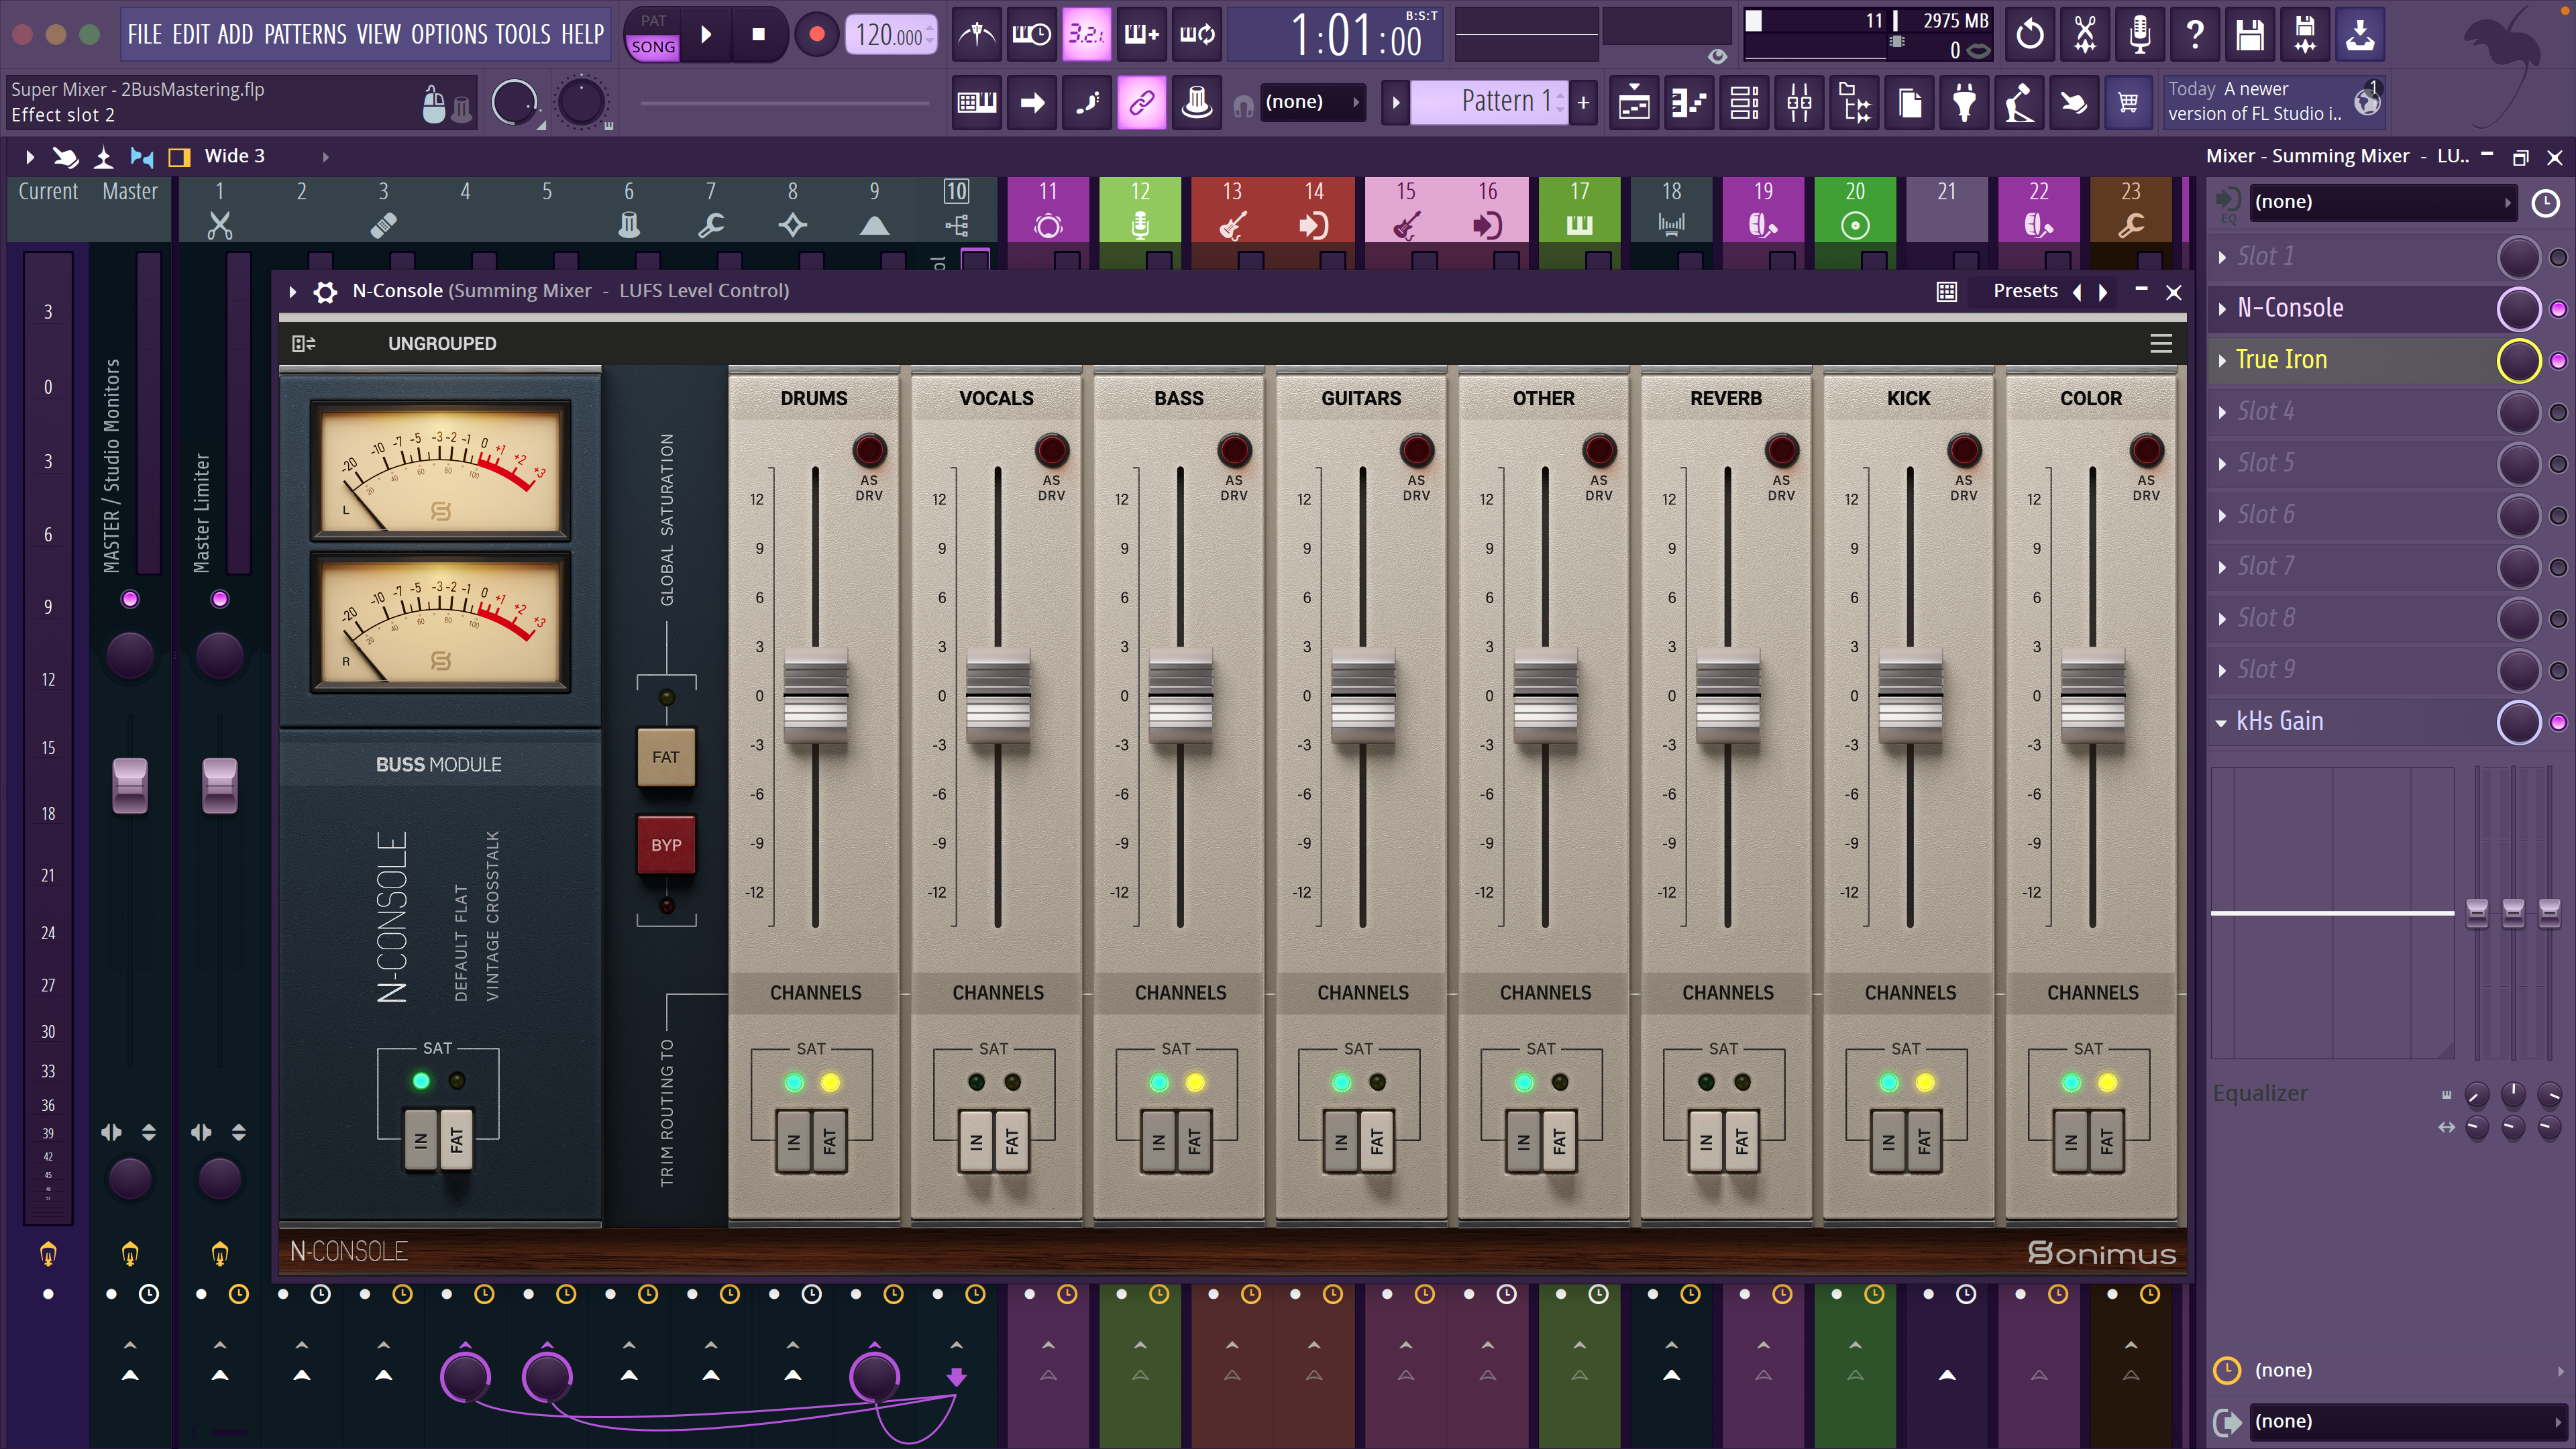
Channel 10 contains the N-Console Summing Mixer plug-in. Most of the 8 buses enter the Master signal chain here on Channel 10 but NOT all of them.
Also if you examine this screen shot carefully it shows the subsequent routing of the signals sent to Channel 10, and where they go from there. Look below:
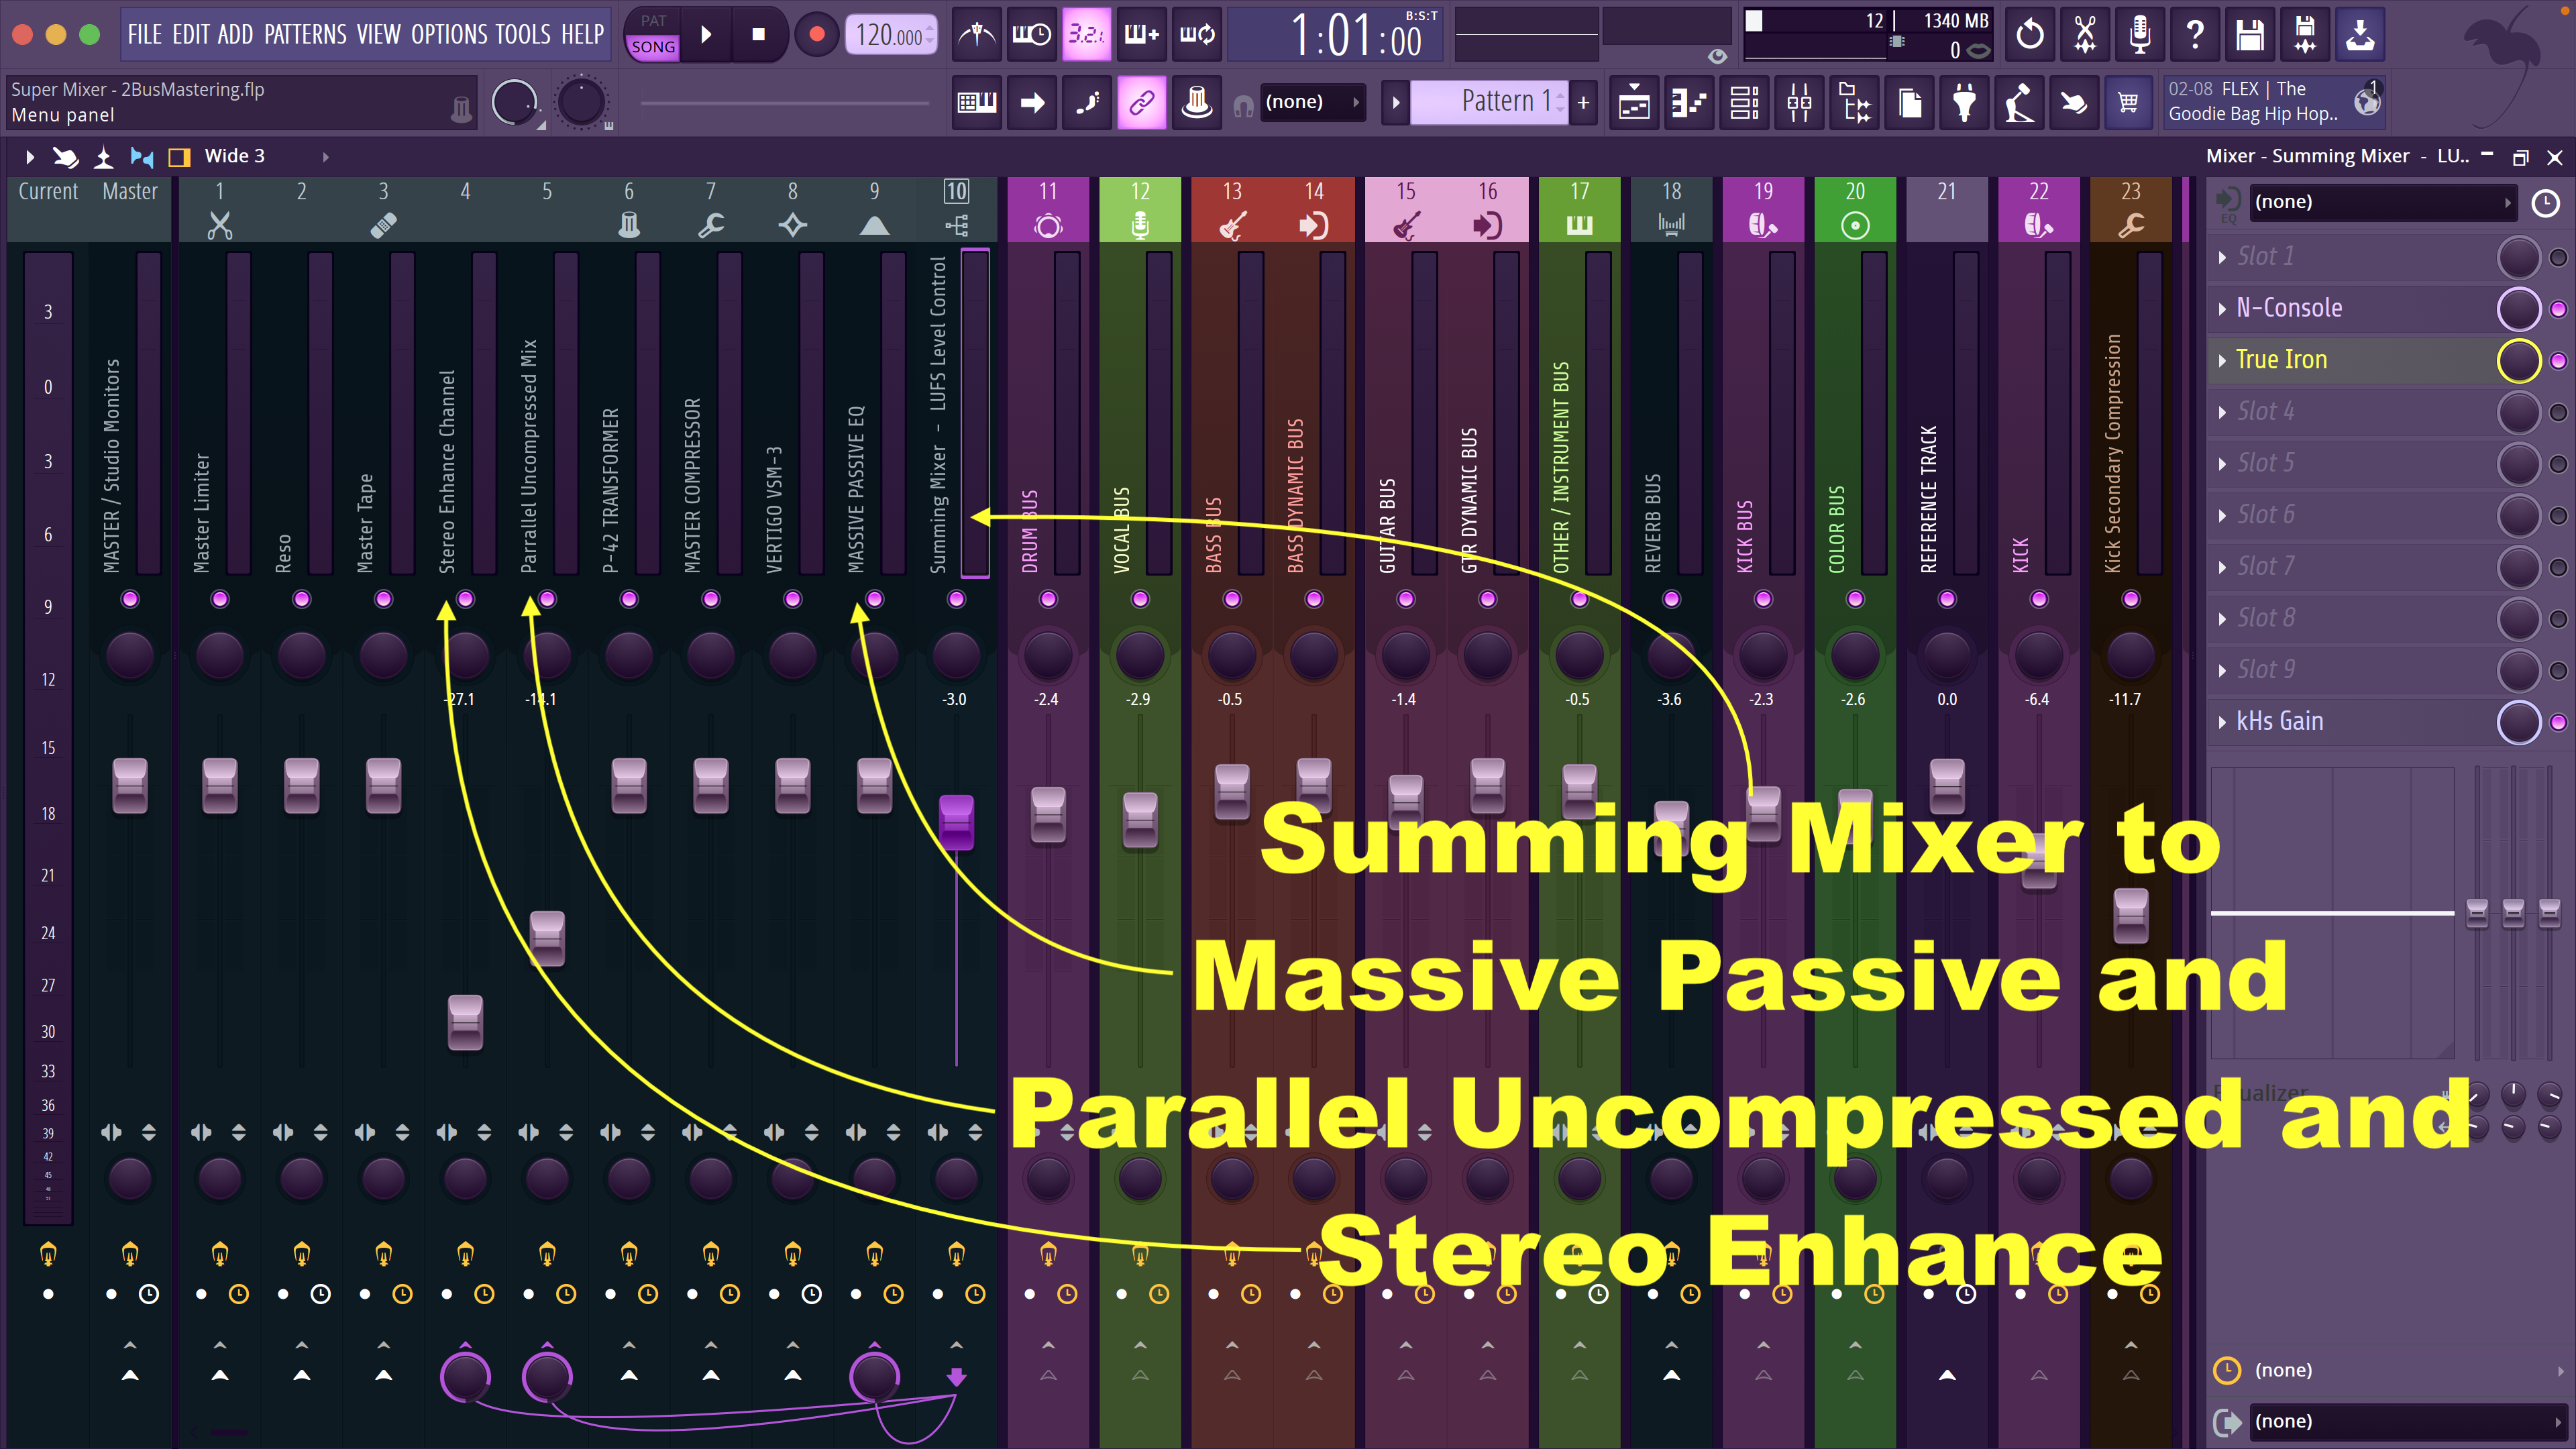
Audio entering the Master Section on Channel 10 will be split into Three Paths:
The First Path goes to Channel 9 and follows the more conventional path going first into the Massive Passive EQ plug-in on that channel. Then to Channels 8, 7, 6, 3, 2, 1, and then out to the Master output.
The Second Path goes to Channel 5 which is a “Parallel Uncompressed Mix” of the music. Now to be fair, most everything has had some sort of dynamic range processing by this time down the signal chain. This does however, bypass the final EQ, final Compression, and final Coloration or Saturation of the audio, to this point. From there, the signal path rejoins the Main Path at Channel 3. Note the fader for Channel 5 is at -14.1db.
The Third Path goes to Channel 4 which is a “Stereo Enhancement” of the audio. Sort of, but NOT in the classic sense you might think. This Path is intended to add the “depth” or subtle complexities that using analog equipment or an analog console can add to the signal. Once the signal is processed on this channel, (and yes it has a special plug-in in it), it rejoins the Main Path at Channel 3. Note that this Channel 4 fader level is set at -27.1db.
Once I figured out this ratio, of the Stereo Enhancement Channel, and the Parallel Mix Channel, I finally had the “Sound,” I was looking for in my DAW, my “Console,” my Mixer. Inside these channels are plug-ins of course, but we will skip that for now. This, right now is about the Bus routing to the Main section.
Next let’s look at the Vocal Bus.
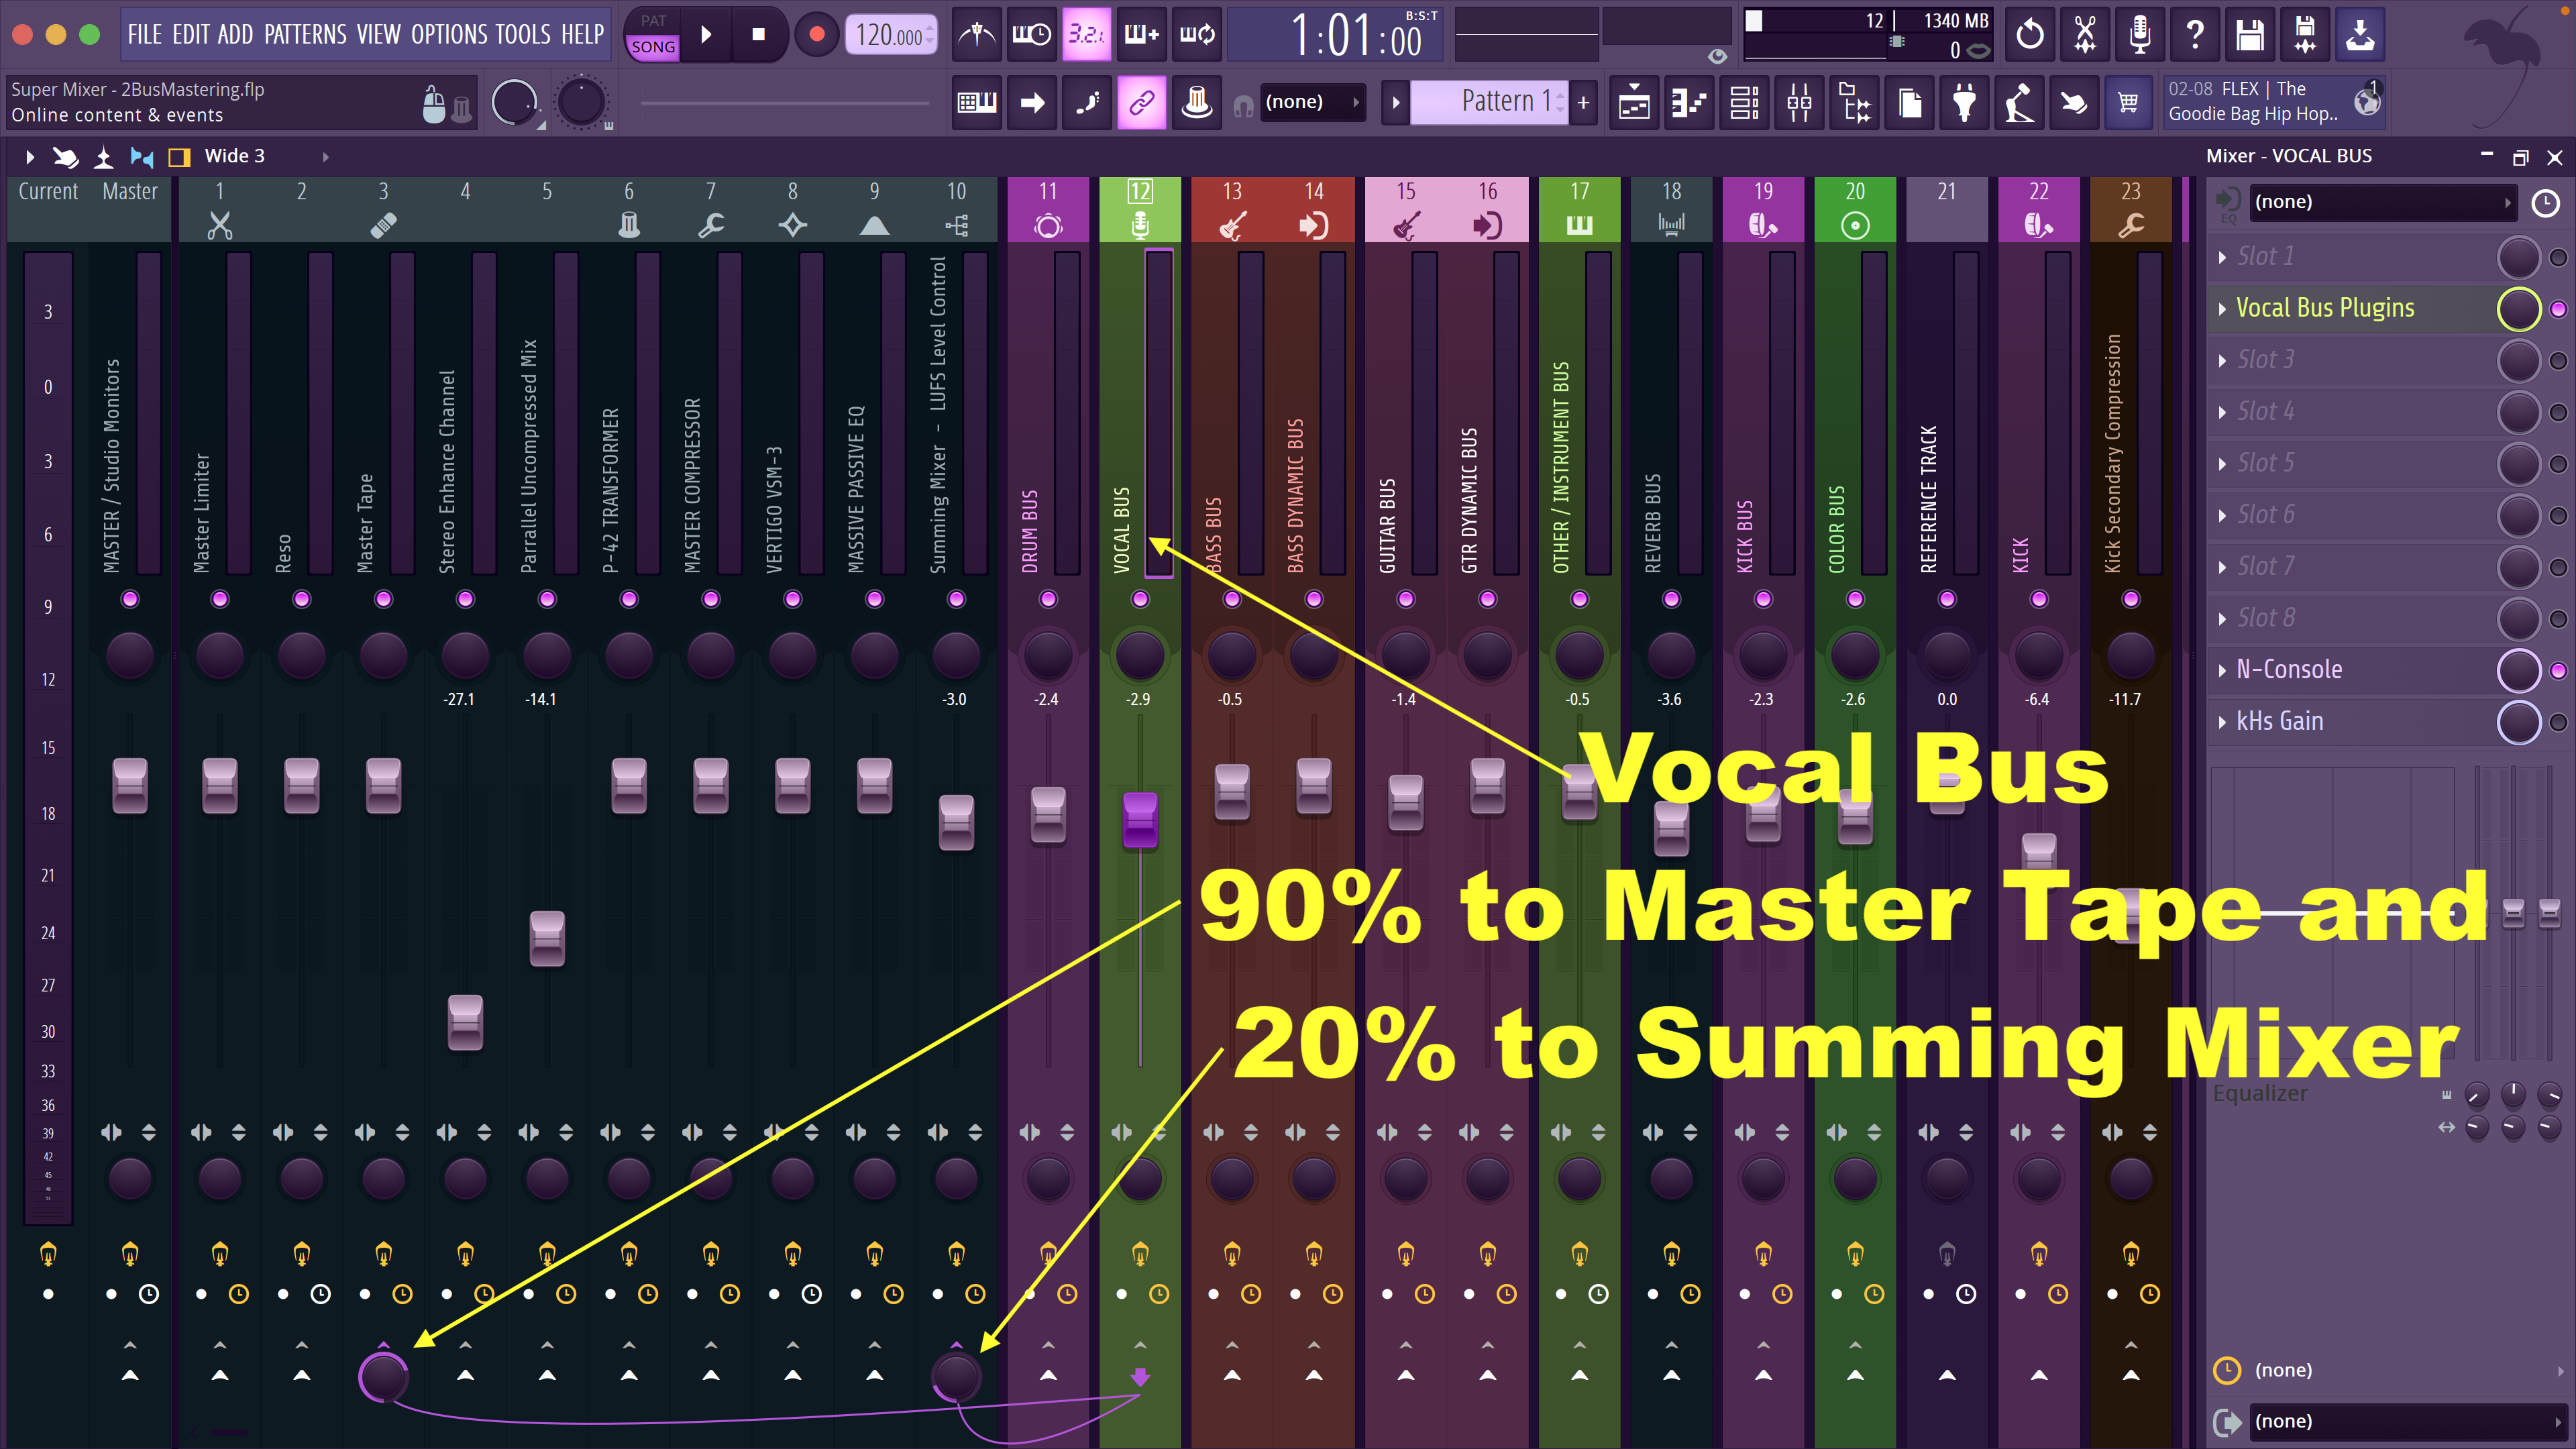
Most of the Vocal Bus signal routes directly to Channel 3 labeled Master Tape. A small portion of the signal routes through the Summing Mixer found on Channel 10.
I hear a few people asking, what the hell is going on? Why doesn’t ALL of the vocal signal just enter where all the music does on channel 10?
There are several reasons for this, that could take several more pages of detailed explanation, however, one of the reasons is to BYPASS the initial Mastering Section of the music, where saturation is used, and compression is used, on the mixed music. Bypassing these stages, for one thing, keeps the vocal from pumping with the other instruments, and keeps it floating above the music.
Let’s move on to another critical Bus. The Reverb Bus.
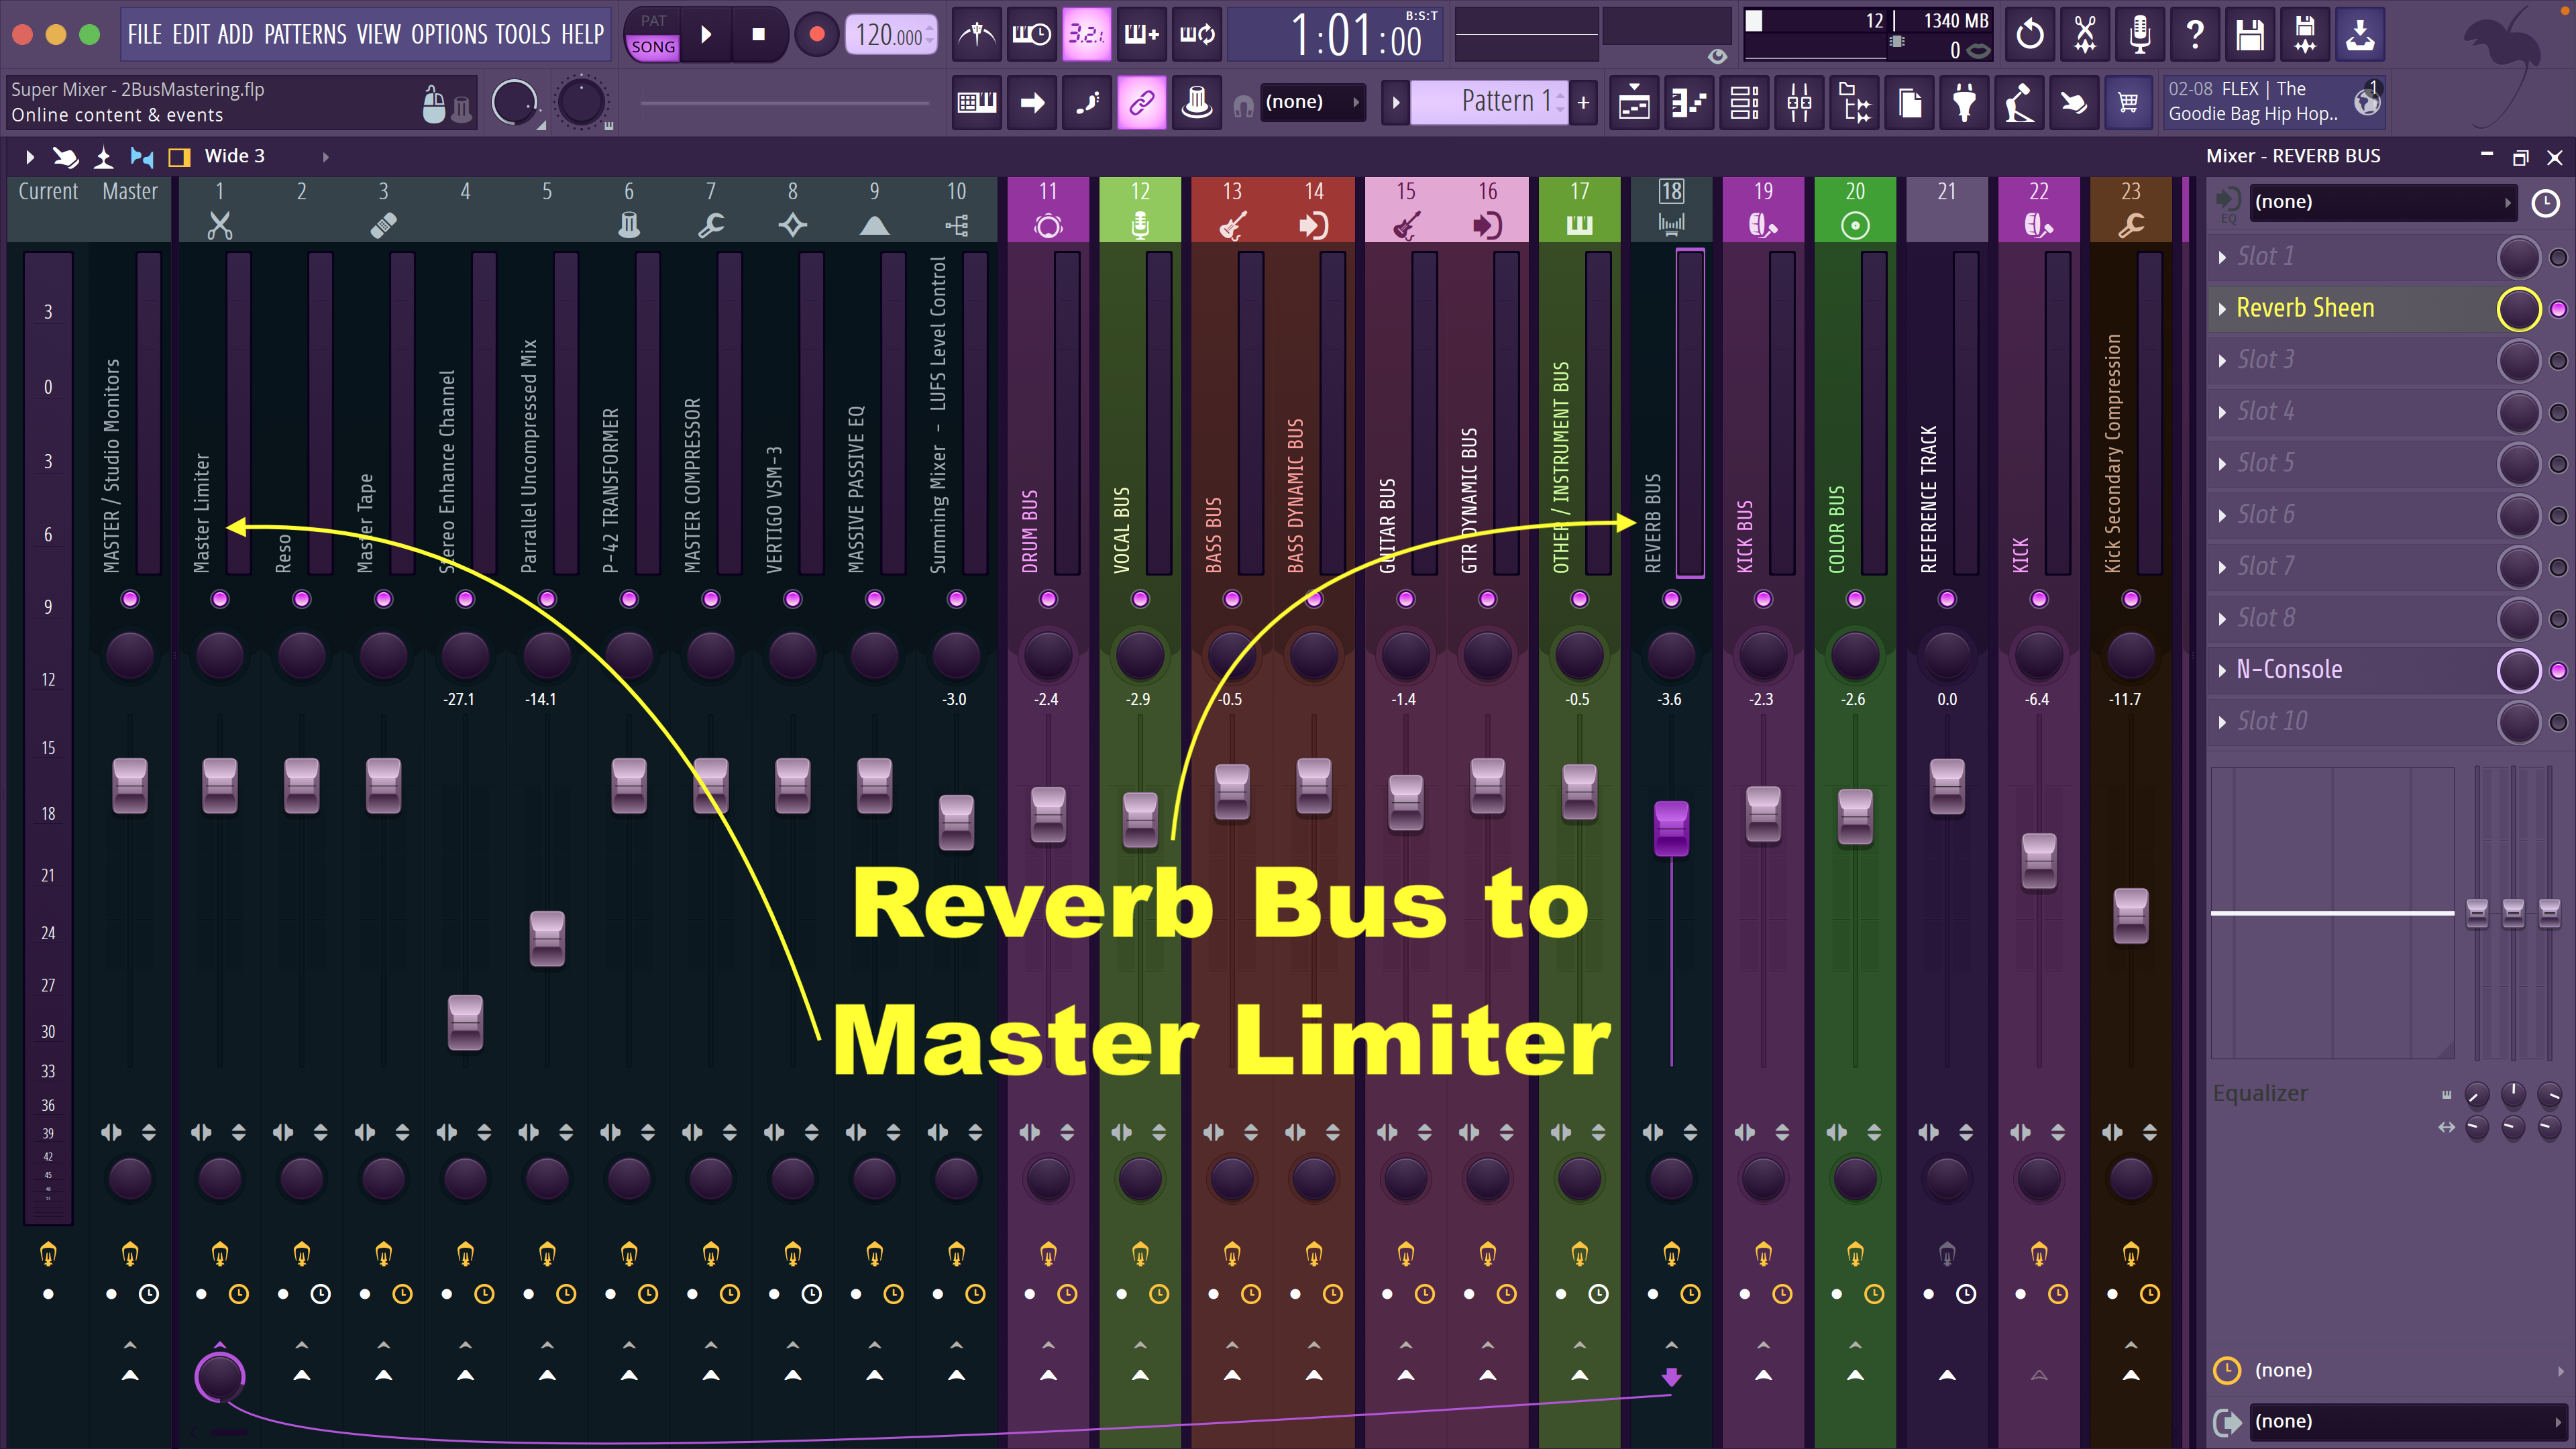
In my “Console,” I use a lot of Reverb Sends, and don’t use Reverb inline on a specific channel, unless there is special reason to. All of the Reverb effects, and room simulations I use, are returned to the Reverb Bus ONLY, and it in turn is routed directly to the Master Limiter.
Why are you doing that?
First, the signal level of Reverb in a mix is low especially in today’s pop music. Even when you are mixing in higher levels of obvious Reverb, the levels are almost always lower, than the main signal. So controlling the dynamics of the Reverb, isn’t necessary. (Most of the time.) Secondly, putting the Reverb signal through the Master Section, that branches off, to the other Channels, to add to the Console’s “depth,” can smear the Reverb signal, and pump the Reverb tails.
All the other Buses route to Channel 10, then start down the Threeway Path as described previously.
Okay did you get all that?
As I present this, and write this, I realize there is a ton more detail that I could put in here. This probably inspires specific questions too, if you are interested in really how this works.
Regardless, let’s go a little deeper if you are still here?
So, my thinking comes from years and years of experience and especially from the years I spent mastering amature and pro records. So many times the mixer had it 80% there, but something was off. Too much or too little bass, the vocal was too low, or too high. Whatever it was, I would imagine, if I could just go back, that one level to the mix, we could get the best possible sound out of this given track.
Since going back is typically not an option, as a Mastering Engineer, one of your main tools to use, if the frequency curve is out of balance. is a Multiband compressor. It can do wonders to rebalance and control the frequency curve and dynamics, but it is a compromise. A Multiband compressor is most needed when the mix is further, “off,” and needing more correction. A good mix, that just needs a little more density, and level, can use a single band compressor.
The system I have set up here in my DAW, is intended to get the, “MIX,” and get to the desired professional Master levels all in ONE pass. This way there are not compromises where dynamic processors are manipulating sections of the frequency curve that don’t need it on the whole mix.
If you have made it this far, thanks for indulging me. I could go on for days about all of this. Bottom line, in my opinion, the DAW setup I have produces incredible results! Let’s work together and make you a believer too!
